用Vite设置Vue前端
我们将使用VITE构建工具来创建我们的前端(客户端)。首先,请确保您在root Directory mevn-crud中,而不是server文件夹。
执行这些命令:
npm create vite@latest client -- --template vue
cd client
npm install
npm run dev
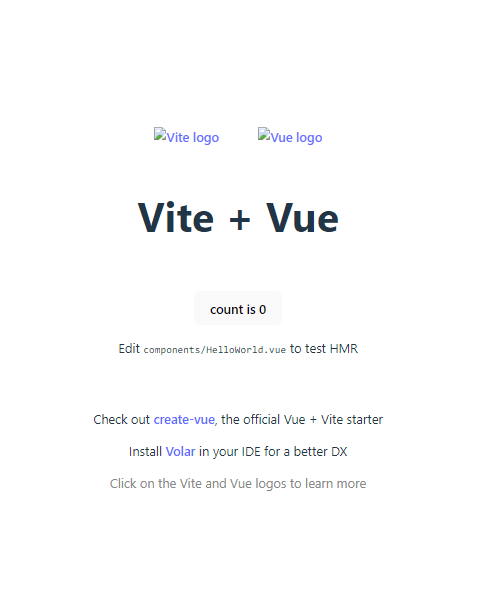
访问http://localhost:5173/查看默认接口,该接口看起来像下图。

终止您的前端,转到您的server文件夹,然后运行npm run dev。它将在http://localhost:5173/上运行客户端和http://localhost:3000/上的服务器。我们能够在concurrently的帮助下运行两个命令,我们在教程开始时安装了两个命令。
后端集成
现在,服务器和客户端正在不同端口上运行。我们希望我们的应用程序相互交互,并希望我们的前端仅通过服务器的端口访问。为了能够在开发和生产环境中运行我们的应用程序,我们将需要模板引擎。我们将使用ejs。
导航到您的client文件夹并安装EJS:
npm install ejs
安装EJS模板引擎后,将index.html重命名为index.html.ejs。在client目录中创建一个views文件夹,然后将更名的文件移入其中。
转到您的server文件夹,还使用上面的命令安装ejs引擎。
我们的主页需要一个路由器。在routes文件夹中创建一个新文件homeRouter.js。将以下代码复制并粘贴到您的新文件中:
// homeRouter.js
import express from "express";

const router = express.Router();

router.get("/*", (_req, res) => {
  res.render("../../client/views/index.html.ejs");
});

export default router;
通过将其导入到index.js文件中。将以下内容添加到index.js:
---
import homeRouter from "./routes/homeRouter.js";

---

// Create routes
app.use(homeRouter);
---
要确定我们的集成,请转到index.hmtl.ejs并替换
<script type="module" src="/src/main.js"></script>
与以下内容:
      <script type="module" src="http://localhost:5173/@vite"></script>
      <script type="module" src="http://localhost:5173/src/main.js"></script>
在您的server文件夹中运行npm run dev,然后访问http://localhost:3000/以确认应用程序已正确集成。如果一切顺利,您的应用程序看起来像下面的图像。

请注意,VITE和VUE徽标拒绝加载。这是因为我们的服务器无法访问图像的位置。下一节将向您展示如何为您的图像和其他资产设置路线。这是一个可选部分;您可以忽略它,然后转到Building CRUD application frontend部分。
可选:设置前端资产的路线
将以下代码添加到您的index.js文件:
//index.js
import path from "path";

---

const publicPath = path.join(path.resolve(), "../client/public");

---

// Create routes
app.use("/", express.static(publicPath));
我们已经成功加载了Vite徽标,但是VUE徽标拒绝加载。我们的VUE徽标不在public目录中,因此我们将需要一条特殊的路线,用于所有以/src开头的资产。
在您的routes文件夹中创建一个名为assetsRouter.js的文件,然后添加以下代码:
//assetsRouter.js
import express from "express";

const router = express.Router();

const supportedAssets = ["svg", "png", "jpg", "png", "jpeg", "mp4", "ogv"];

const assetExtensionRegex = () => {
  const formattedExtensionList = supportedAssets.join("|");

  return new RegExp(`/.+\.(${formattedExtensionList})$`);
};

router.get(assetExtensionRegex(), (req, res) => {
  res.redirect(303, `http://localhost:5173/src${req.path}`);
});

export default router;
将其附加到您的index.js文件:
//index.js
import assetsRouter from "./routes/assestsRouter.js";

---

// Create routes
app.use("/src", assetsRouter);
现在所有图像成功加载。
构建Crud应用程序前端
你走了很长一段路;的确,您应该得到赞誉。
我们已经成功地将前端加载到服务器上,但是我们需要确保客户实际上可以与服务器进行交互。我们将创建一个简单的前端,以消耗我们的crud api。
我们将使用axios消耗API,因此请在您的client文件夹中安装axios。
npm i axios
转到您的src文件夹,然后删除components文件夹以及其中的所有内容。用以下内容替换App.vue文件的内容:
<template>
  <main>
    <h1 class="title">MEVN CRUD APP</h1>

    <form @submit.prevent="addTodo" method="post">
      <input class="input" v-model="title" type="text" name="name" placeholder="Enter todo" />
      <input class="input" v-model="description" type="text" name="description" placeholder="Enter Description" />
      <button type="submit" class="submit-btn">Add Todo</button>
    </form>
    <div class="todo-wrapper">
      <h2 class="caption">Todo List</h2>
      <div v-if="todos.length < 1">Todo list is empty</div>
      <ul v-else>
        <li class="todo-item" v-for="(todo, i) in todos" :key="todo._id">
          <div class="todo">
            <h3 class="todo-title">{{ todo.title }}</h3>
            <span class="todo-description">{{ todo.description }}</span>
          </div>

          <div class="update-form" id="updateForm">
            <input type="text" name="updateTitle" id="updateTodo" v-model="updateTitle" />
            <br />
            <input type="text" name="updateDescription" id="updateTodo" v-model="updateDescription" />
          </div>
          <div class="todo-btns">
            <button type="button" class="edit-btn" @click="updateTodo($event, todo._id, i, todo)">
              Edit
            </button>
            <button type="button" class="del-btn" @click="delTodo(todo._id, i)">
              Delete
            </button>
          </div>
        </li>
      </ul>
    </div>
  </main>
</template>

<script>
import axios from "axios";

export default {
  name: "App",
  data() {
    return {
      title: "",
      description: "",
      todos: [],
      updateTitle: "",
      updateDescription: "",
    };
  },
  mounted() {
    this.getTodos();
  },
  methods: {
    async getTodos() {
      const res = await axios.get("/api/todoList");
      this.todos = res.data;
    },

    async addTodo() {
      const res = await axios.post("api/todoList/", {
        title: this.title,
        description: this.description,
      });
      this.title = "";
      this.description = "";
    },

    async delTodo(id) {
      await axios.delete(`api/todoList/${id}`);
    },

    async updateTodo(event, id, i, todo) {
      const updateForm = document.getElementsByClassName("update-form");
      const updateFormArray = [...updateForm];
      updateFormArray.forEach(async (el) => {
        if (updateFormArray.indexOf(el) === i) {
          if (!el.classList.contains("active")) {
            el.classList.add("active");
            this.updateTitle = todo.title;
            this.updateDescription = todo.description;
            event.target.innerHTML = "Save";
          } else {
            const res = await axios.put(`api/todoList/${id}`, {
              title: this.updateTitle,
              description: this.updateDescription,
            });
            event.target.innerHTML = "Edit";
            el.classList.remove("active");
            this.updateTitle = "";
            this.updateDescription = "";
          }
        }
      });
    },
  },
  watch: {
    todos() {
      this.getTodos(); // Watch todos list for any change
    },
  },
};
</script>
然后用此
替换您的style.css文件内容
*,
*::before,
*::after {
  margin: 0;
  padding: 0;
  box-sizing: border-box;
}

body {
  padding: 40px 5%;
}

main {
  width: 100%;
  max-width: 600px;
  margin: 0 auto;
}

.title {
  text-align: center;
  margin-bottom: 30px;
}

.input {
  padding: 20px;
  display: block;
  width: 100%;
  margin: 0 auto 10px;
}

.submit-btn {
  display: block;
  padding: 20px;
  border: 0;
  background-color: green;
  color: white;
  width: 100%;
  margin: 20px auto 0;
  cursor: pointer;
}

.todo-wrapper {
  margin-top: 50px;
}

.todo-wrapper .caption {
  margin-bottom: 15px;
}

.todo-item {
  width: 100%;
  display: flex;
  justify-content: space-between;
  align-items: center;
  background-color: rgb(207, 236, 207);
  padding: 10px;
}

.todo-item:nth-child(even) {
  background-color: white;
}

.todo-title {
  margin-bottom: 7px;
}

.todo-btns button {
  padding: 10px;
  cursor: pointer;
  border: 0;
}

.edit-btn {
  background-color: green;
  color: white;
  margin-right: 7px;
}

.del-btn {
  background-color: red;
  color: white;
}

.update-form {
  position: absolute;
  display: none;
}

.update-form input {
  padding: 7px;
  border: 0;
}

.update-form.active {
  display: block;
}
运行您的应用程序。如果一切顺利,您应该能够从前端加载,创建,更新和删除。
概括
我们成功地开发了我们的Mevn Crud应用程序。在这一部分中,我们能够使用Vite Build Tool设置Vue Frontend,并将其与后端集成在一起。最后,我们创建了应用程序的前端,在其中消耗了第1部分中创建的API。
本系列的第3部分将涵盖我们的应用程序准备就绪所需的配置。它还带有您不想错过的奖励。
github存储库:https://github.com/isonguyom/mevn-crud
现场演示:https://mevn-crud.onrender.com/
如果您有任何疑问或补充,请将它们留在下面的评论部分中。