介绍
如今, Docker狂热,生产中托管容器已成为常态。复杂的应用程序堆栈已经超出了在AWS中运行灯泡的t2.small实例。但是,如果您的成功业务建立在一个精彩的PHP购物网站上,并且希望您能在当今的高级平台上部署和精心策划图像的所有来龙去脉,该怎么办?随着每天的过去,运行RHEL5和RHEL6的T2实例被AWS拆除,无法被任何合适的替代方案所取代。
本指南将通过使用docker build托管您的生产PHP应用程序以及使用docker bake的Kubernetes托管生产PHP应用程序来帮助您避免编排和部署困境。提出的示例将显示现代的PHP7堆栈在RHEL8上运行,使用当今生产工作负载可用的最新创新。您不需要学习有关docker push,docker run,kubectl等的复杂想法。通过此示例,您可以在短短30分钟内在现代时代启动并运行。
从Docker Build开始简单
docker build是一个初学者的命令,它允许您在没有复杂的基础架构或专业知识的情况下执行复杂的工作流和外壳脚本。如果您是docker build的新手,则可以在线找到一些良好的资源。基本上,您将创建一个Dockerfile,然后提供有关选择哪种操作系统的说明,该操作系统要安装哪个软件包,将代码复制到目录中,然后从那里运行您的网站命令。
此示例基于Redhat的excellent blog post。
将以下示例保存在您的CVS文件夹中,其中PHP代码命名并命名为Dockerfile.rhel8。
FROM registry.access.redhat.com/ubi8/ubi:8.1 AS runtime

ARG NGROK_TOKEN

#RUN yum --disableplugin=subscription-manager -y module enable php:7.3 \
#  && yum --disableplugin=subscription-manager -y install httpd php wget \
#  && yum --disableplugin=subscription-manager clean all
RUN yum --disableplugin=subscription-manager -y install httpd php wget \
  && yum --disableplugin=subscription-manager clean all

RUN wget --no-verbose 'https://bin.equinox.io/c/bNyj1mQVY4c/ngrok-v3-stable-linux-amd64.tgz' \
  && tar xvzf ngrok-v3-stable-linux-amd64.tgz -C /usr/local/bin \
  && rm -f ngrok-v3-stable-linux-amd64.tgz

COPY *.php /var/www/html

RUN sed -i 's/Listen 80/Listen 8080/' /etc/httpd/conf/httpd.conf \
  && sed -i 's/listen.acl_users = apache,nginx/listen.acl_users =/' /etc/php-fpm.d/www.conf \
  && mkdir /run/php-fpm \
  && chgrp -R 0 /var/log/httpd /var/run/httpd /run/php-fpm \
  && chmod -R g=u /var/log/httpd /var/run/httpd /run/php-fpm

FROM runtime

COPY *.php /var/www/html

RUN php-fpm & httpd -D FOREGROUND & NGROK_TOKEN=$NGROK_TOKEN ngrok http 8080 --log=stdout
此文件将创建一个docker容器,并运行您安装习惯的完整灯泡堆栈所需的所有设置命令,而无需任何基础架构或DEVOPS帮助。在每个步骤中,我们执行设置命令并下载yum软件包以将软件添加到您的运行容器中。
您会注意到,尽管docker build非常强大,并且可以运行您告诉的任何命令,但它不允许您连接到任何网络资源以进行安全和保障。也就是说,通常,您只能运行nginx,然后访问http://localhost:8080访问您的网站。 nginx命令在localhost上运行,但您将无法访问它。它是容器内部不同的localhost。您可以在这种情况下称其为remotehost。
所有这些网络细节都被docker build的安全预防措施牢固地隐藏了。当您可以部署到生产时,您将使用这些安全功能,因为docker build命令无法使用网络功能。因此,我们使用Ngrok来解决这些细节。
可以自定义nGrok隧道命令,以在选择的端点上使用自定义域,以及在何处发布正确的ngrok令牌。要在本地运行您的网站,只需在笔记本电脑上输入此信息(这还不是生产,因此您可以在此时使用自动生成的主机名):
read -p "Input token? " NGROK_TOKEN
export NGROK_TOKEN
docker build -f Dockerfile.rhel8 -t mywebsiteapp:1 --build-arg NGROK_TOKEN=$NGROK_TOKEN .
这将要求您的制作Ngrok令牌托管,然后您的网站可用:
Input token? *********
#1 [internal] load .dockerignore
#1 transferring context: 2B done
#1 DONE 0.0s

#2 [internal] load build definition from Dockerfile.rhel8
#2 transferring dockerfile: 940B done
#2 DONE 0.0s

#3 [internal] load metadata for registry.access.redhat.com/ubi8/ubi:8.1
#3 DONE 0.5s

#4 [1/6] FROM registry.access.redhat.com/ubi8/ubi:8.1@sha256:1f0e6e1f451ff020b3b44c1c4c34d85db5ffa0fc1bb0490d6a32957a7a06b67f
#4 DONE 0.0s

#5 [2/6] RUN yum --disableplugin=subscription-manager -y module enable php:7.3   && yum --disableplugin=subscription-manager -y install httpd php wget   && yum --disableplugin=subscription-manager clean all
#5 CACHED

#6 [internal] load build context
#6 transferring context: 30B done
#6 DONE 0.0s

#7 [3/6] RUN wget --no-verbose 'https://bin.equinox.io/c/bNyj1mQVY4c/ngrok-v3-stable-linux-amd64.tgz'   && tar xvzf ngrok-v3-stable-linux-amd64.tgz -C /usr/local/bin && rm -f ngrok-v3-stable-linux-amd64.tgz
#7 3.511 2023-08-04 21:41:43 URL:https://bin.equinox.io/c/bNyj1mQVY4c/ngrok-v3-stable-linux-amd64.tgz [8826207/8826207] -> "ngrok-v3-stable-linux-amd64.tgz" [1]
#7 3.519 ngrok
#7 DONE 3.8s

#8 [4/6] ADD index.php /var/www/html
#8 DONE 0.1s

#9 [5/6] RUN sed -i 's/Listen 80/Listen 8080/' /etc/httpd/conf/httpd.conf   && sed -i 's/listen.acl_users = apache,nginx/listen.acl_users =/' /etc/php-fpm.d/www.conf   && mkdir /run/php-fpm   && chgrp -R 0 /var/log/httpd /var/run/httpd /run/php-fpm   && chmod -R g=u /var/log/httpd /var/run/httpd /run/php-fpm
#9 DONE 0.5s

#10 [6/6] RUN php-fpm & httpd -D FOREGROUND & NGROK_TOKEN=xyzzy ngrok http 8080 --log=stdout
#10 0.586 t=2023-08-04T21:41:44+0000 lvl=info msg="no configuration paths supplied"
#10 0.586 t=2023-08-04T21:41:44+0000 lvl=info msg="ignoring default config path, could not stat it" path=/root/.config/ngrok/ngrok.yml
#10 0.587 t=2023-08-04T21:41:44+0000 lvl=info msg="starting web service" obj=web addr=127.0.0.1:4040 allow_hosts=[]
#10 0.601 AH00558: httpd: Could not reliably determine the server's fully qualified domain name, using 127.0.0.1. Set the 'ServerName' directive globally to suppress this message
#10 0.941 t=2023-08-04T21:41:44+0000 lvl=info msg="client session established" obj=tunnels.session obj=csess id=c8fe54e8acb1
#10 0.941 t=2023-08-04T21:41:44+0000 lvl=info msg="tunnel session started" obj=tunnels.session
#10 1.050 t=2023-08-04T21:41:44+0000 lvl=info msg="started tunnel" obj=tunnels name=command_line addr=http://localhost:8080 url=https://999-99-999-9-99.ngrok.io
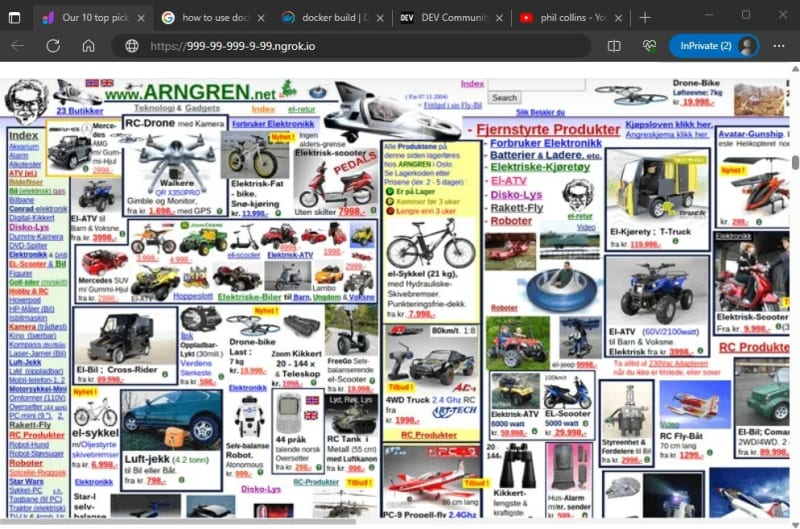
此时,您的网站正在运行,您将能够在浏览器中加载新网站:
请注意,您不需要使用任何复杂的push,pull或run命令。容器只能运行并等待您测试代码。
我感到疼痛,速度的缓存
您可能会注意到Docker不会在构建中缓存最终结果,因为它无法完成整层。这是通过设计的,以便您的代码被固定并且不存储不安全的任何地方。但是,通过利用最精英Docker用户可用的multi-stage dockerfile,您可以看到后续构建会非常快,放慢速度仅在更新后或重新启动开发环境后复制它。
$ docker build -f Dockerfile.rhel -t rhel8:4 . --build-arg NGROK_TOKEN=$NGROK_TOKEN --progress plain
#1 [internal] load build definition from Dockerfile.rhel
#1 transferring dockerfile: 966B done
#1 DONE 0.0s

#2 [internal] load .dockerignore
#2 transferring context: 2B done
#2 DONE 0.0s

#3 [internal] load metadata for registry.access.redhat.com/ubi8/ubi:8.1
#3 DONE 0.3s

#4 [runtime 1/4] FROM registry.access.redhat.com/ubi8/ubi:8.1@sha256:1f0e6e1f451ff020b3b44c1c4c34d85db5ffa0fc1bb0490d6a32957a7a06b67f
#4 DONE 0.0s

#5 [runtime 2/4] RUN yum --disableplugin=subscription-manager -y module enable php:7.3   && yum --disableplugin=subscription-manager -y install httpd php wget   && yum --disableplugin=subscription-manager clean all
#5 CACHED

#6 [runtime 3/4] RUN wget --no-verbose 'https://bin.equinox.io/c/bNyj1mQVY4c/ngrok-v3-stable-linux-amd64.tgz'   && tar xvzf ngrok-v3-stable-linux-amd64.tgz -C /usr/local/bin && rm -f ngrok-v3-stable-linux-amd64.tgz
#6 CACHED

#7 [internal] load build context
#7 transferring context: 30B done
#7 DONE 0.0s

#8 [runtime 4/4] RUN sed -i 's/Listen 80/Listen 8080/' /etc/httpd/conf/httpd.conf   && sed -i 's/listen.acl_users = apache,nginx/listen.acl_users =/' /etc/php-fpm.d/www.conf   && mkdir /run/php-fpm   && chgrp -R 0 /var/log/httpd /var/run/httpd /run/php-fpm   && chmod -R g=u /var/log/httpd /var/run/httpd /run/php-fpm
#8 DONE 0.4s

#9 [stage-1 1/2] COPY index.php /var/www/html
#9 DONE 0.1s

#10 [stage-1 2/2] RUN php-fpm & httpd -D FOREGROUND & NGROK_TOKEN= ngrok http 8080 --log=stdout
#10 0.477 t=2023-08-05T22:33:54+0000 lvl=info msg="no configuration paths supplied"
#10 0.477 t=2023-08-05T22:33:54+0000 lvl=info msg="ignoring default config path, could not stat it" path=/root/.config/ngrok/ngrok.yml
#10 0.478 t=2023-08-05T22:33:54+0000 lvl=info msg="starting web service" obj=web addr=127.0.0.1:4040 allow_hosts=[]
#10 0.487 AH00558: httpd: Could not reliably determine the server's fully qualified domain name, using 127.0.0.1. Set the 'ServerName' directive globally to suppress this message
#10 0.816 t=2023-08-05T22:33:54+0000 lvl=info msg="client session established" obj=tunnels.session obj=csess id=88117dc8c891
#10 0.816 t=2023-08-05T22:33:54+0000 lvl=info msg="tunnel session started" obj=tunnels.session
#10 0.906 t=2023-08-05T22:33:54+0000 lvl=info msg="started tunnel" obj=tunnels name=command_line addr=http://localhost:8080 url=https://abcde-99-999-9-99.ngrok.io
您可以看到以前的层被缓存并且您的代码在内存中安全可靠的步骤,现在的步骤非常快。以前的构建需要6秒钟才能完成,而缓存的版本则花了不到0.7秒,节省了不到90%!
!在生产之前,在本地更新您的代码
显然,您需要进行一些更改,并在准备发布到生产之前进行调整和测试。没问题,请在笔记本电脑的另一个终端中使用以下示例:
cd production-web-site
cvs update
pico sales.php
<make your changes and save>
cvs add sales.php
cvs commit -m "Add thinner border and show postal code" .
切换回原始的Docker构建命令终端并击中Apple-CMD-C以终止原始站点。然后再次运行您网站的两个版本:
read -p "Input token? " NGROK_TOKEN
export NGROK_TOKEN
docker build -f Dockerfile.rhel8 -t mywebsiteapp:2 .
在Kubernetes跑步
每个人都想部署到Kubernetes,但这很难,即使不是不可能。但是,在群集中添加buildx构建器以为您的容器部署生产级别的质量是相对简单的。同样,不需要推动和拉动复杂性。
我们依靠的docker build的这一新功能是使用docker build bake命令将运行容器部署到Kubernetes的能力。 bake命令是build的延伸,就像您要制造烤箱然后烤蛋糕一样。代码是相同的。
要使用bake在Kubernetes上运行您的生产网站,您将首先创建将运行您的生产网站的buildx实例POD:
$ docker buildx create mywebsite --driver kubernetes --driver-opt nodeselector=kubernetes.io/arch=amd64
watoosi-canal
您可以使用以下命令列出您的构建器
docker buildx ls
NAME/NODE       DRIVER/ENDPOINT             STATUS  BUILDKIT PLATFORMS
watoosie-canal* kubernetes
  watoosie-canal0 ......... running v0.19.4  linux/amd64
接下来,您需要创建一个bake文件,该文件与代码的配方非常相似,以便进入Kubernetes烤箱。
关于NGROK配置的快速注释:您可以在ngrok.yaml配置文件中使用主机名等提供凭据。这是设置自定义域名,网络和安全设置等的推荐方法。您可以访问ngrok documentation以获取更多详细信息。
只需创建一个称为docker-bake.prod.hcl的文件,带有以下内容:
target "webapp-release" {
  dockerfile = "Dockerfile.rhel8"
  tags = ["mywebsiteapp"]
  platforms = ["linux/amd64"]
  args = {
    NGROK_TUNNEL = "<insert credentials here>"
  }
}
然后运行以下命令连接到kubernetes,部署构建容器并运行您的网站!
docker buildx bake -f docker-bake.prod.hcl webapp-release
(如果您的网站崩溃或要重新启动它,则可能需要找到构建实例并按照以下方式使用它:)
$ docker buildx ls
....
$ docker buildx use <name of instance>
访问您的浏览器生产网站,您会看到类似的东西:
结论
如果您在生产中使用docker build,我想听听它!我们可以分享最佳实践并撰写更多博客文章以分享知识。
摄

