Gitea是一个开源项目,它提供了一个类似于GitHub的接口,可以自托托管。它包括传统的PR工作流程,GIT+SSH身份验证,动作跑步者,CI/CD的GITEA操作以及PYPI托管的Gitea软件包。本文将讨论:
- 为Gitea设置DB
- 设置Gitea
- 准备Python存储库
- 设置Action Runner
- 实施CI/CD管道将Python软件包部署到Gitea
DB设置
Gitea由用于处理数据存储的数据库支持。这三个主要提供商是SQLite,MySQL和Postgres。虽然SQLite可能是最简单的解决方案,因此我将展示如何进行Postgres设置。这主要遵循these instructions。另外,我将在大多数说明中使用Ubuntu Linux。
$ sudo apt-get install postgresql postgresql-contrib
我将首先编辑配置以进行一些调整。将密码加密更改为更安全的东西:
$ sudo vim /etc/postgresql/14/main/postgresql.conf
请注意,根据您的Postgres安装,目录可能不同。然后更改文件以取消注释:
password_encryption = scram-sha-256
请注意,如果您打算远程使用此数据库,则需要更改绑定地址:
listen_addresses = '192.168.8.5'
您想收听的IP是什么。如果您使用的是管理DB服务,则可以忽略此步骤,只需要向他们询问端点即可。还需要为数据库设置设置适当的语言环境。深入查看本地的本文范围很大,但是在我的示例中,我使用en_US.UTF-8:
$ sudo locale-gen en_US.UTF-8
Generating locales (this might take a while)...
  en_US.UTF-8... done
Generation complete.
由于地区是区域差异和语言的混合,您也可以自己设置。一个相当全面的清单can be found here。对于更复杂的语言/区域要求,我建议您查看how language tags work。现在重新启动服务以提取新更改:
$ sudo systemctl restart postgresql.service
现在,在使用Postgres执行管理任务时,它使用系统“ Postgres”用户允许更孤立的设置安全性。我们将继续使用su更改为Postgres用户,并立即运行PSQL命令以访问数据库:
$ sudo su -c "psql" - postgres
psql (14.8 (Ubuntu 14.8-0ubuntu0.22.04.1))
Type "help" for help.

postgres=#
成功的执行为我们提供了一个交互式提示,可以通过各种命令将其用于管理服务器。我们在这里需要做的仅有的两件事是为该用户创建一个用户和数据库:
postgres=# CREATE ROLE gitea WITH LOGIN PASSWORD 'a_more_secure_password_than_this';
CREATE ROLE
postgres=# CREATE DATABASE giteadb WITH OWNER gitea TEMPLATE template0 ENCODING UTF8 LC_COLLATE 'en_US.UTF-8' LC_CTYPE 'en_US.UTF-8';
CREATE DATABASE
postgres=# \q
$
您需要用实际的安全密码替换假密码字符串。另外,请务必将所选区域的任何地方替换为en_US.UTF-8。现在,我们需要修改/etc/postgresql/14/main/pg_hba.conf以授权我们的用户:
local   giteadb         gitea                                   scram-sha-256
# DO NOT DISABLE!
# If you change this first entry you will need to make sure that the
# database superuser can access the database using some other method.
# Noninteractive access to all databases is required during automatic
# maintenance (custom daily cronjobs, replication, and similar tasks).
#
# Database administrative login by Unix domain socket
local   all             postgres                                peer
这与传统的用户名/密码身份验证不同,因为您还可以强制诸如密码加密和连接方法(在这种情况下为Unix域插座)之类的内容。虽然此方法适用于本地设置,但连接到RDS Postgres数据库之类的远程设置需要此操作:
host giteadb gitea [cidr info here] scram-sha-256
重要的是要注意,线相对于其他主机的位置非常重要。这是由于Postgres解析规则并在第一场比赛中停下来。鉴于我们要连接到UNIX套接字,我们需要将其超过管理登录,否则由于错误的用户而拒绝连接(git而不是Postgres)。
gitea安装
安全通知:此设置旨在用于本地部署。使用DB,跑步者和Gitea以及使用HTTP流量的Gitea的同一实例对于实际的生产部署而言并不是很不错的。进行生产部署时,请确保使用HTTPS,并且数据库/跑步者在Gitea的单独硬件上。
虽然有一个可用于ubuntu的snap version,但我更喜欢进行二进制安装以进行更多控制:
$ wget https://dl.gitea.com/gitea/1.19.4/gitea-1.19.4-linux-amd64
注意,我正在从当前稳定的分支上运行。检查installation page,以获取有关使用其他操作系统的确切文件的说明。现在我将对文件进行验证:
$ wget https://dl.gitea.com/gitea/1.19.4/gitea-1.19.4-linux-amd64.asc
$ gpg --keyserver keys.openpgp.org --recv 7C9E68152594688862D62AF62D9AE806EC1592E2
gpg: key 2D9AE806EC1592E2: public key "Teabot <teabot@gitea.io>" imported
gpg: Total number processed: 1
gpg:               imported: 1
$ gpg --verify gitea-1.19.4-linux-amd64.asc gitea-1.19.4-linux-amd64
gpg: Signature made Tue Jul  4 14:04:23 2023 CDT
gpg:                using RSA key CC64B1DB67ABBEECAB24B6455FC346329753F4B0
gpg: Good signature from "Teabot <teabot@gitea.io>" [unknown]
gpg: WARNING: This key is not certified with a trusted signature!
gpg:          There is no indication that the signature belongs to the owner.
Primary key fingerprint: 7C9E 6815 2594 6888 62D6  2AF6 2D9A E806 EC15 92E2
     Subkey fingerprint: CC64 B1DB 67AB BEEC AB24  B645 5FC3 4632 9753 F4B0
可以忽略可信赖的签名内容,因为我们已经知道签名确实属于所有者,因为它来自官方网站文档。接下来,我们将设置一个git用户,该用户将允许孤立的用户以:
运行。
$ sudo adduser \
   --system \
   --shell /bin/bash \
   --gecos 'Git Version Control' \
   --group \
   --disabled-password \
   --home /home/git \
   git
[sudo] password for cwprogram:
Adding system user `git' (UID 109) ...
Adding new group `git' (GID 119) ...
Adding new user `git' (UID 109) with group `git' ...
Creating home directory `/home/git' ...
现在为Gitea创建必要的目录结构:
$ sudo mkdir -p /var/lib/gitea/{custom,data,log}
$ sudo chown -R git:git /var/lib/gitea/
$ sudo chmod -R 750 /var/lib/gitea/
$ sudo mkdir /etc/gitea
$ sudo chown root:git /etc/gitea
$ sudo chmod 770 /etc/gitea
请注意,这些权限适用于Web安装程序,我们将仅将其中一些更改为更安全的读数。现在复制并验证gitea二进制文件:
$ sudo cp gitea-1.19.4-linux-amd64 /usr/local/bin/gitea
$ sudo chmod a+x /usr/local/bin/gitea
$ gitea --version
Gitea version 1.19.4 built with GNU Make 4.1, go1.20.5 : bindata, sqlite, sqlite_unlock_notify
我将使用SystemD服务来管理Gitea本身,因此我将下载文件进行编辑:
$ wget https://raw.githubusercontent.com/go-gitea/gitea/release/v1.19/contrib/systemd/gitea.service
$ vim gitea.service
修改内容并修剪文件后:
[Unit]
Description=Gitea (Git with a cup of tea)
After=syslog.target
After=network.target
Wants=postgresql.service
After=postgresql.service
[Service]
# Uncomment the next line if you have repos with lots of files and get a HTTP 500 error because of that
# LimitNOFILE=524288:524288
RestartSec=2s
Type=simple
User=git
Group=git
WorkingDirectory=/var/lib/gitea/
# If using Unix socket: tells systemd to create the /run/gitea folder, which will contain the gitea.sock file
# (manually creating /run/gitea doesn't work, because it would not persist across reboots)
#RuntimeDirectory=gitea
ExecStart=/usr/local/bin/gitea web --config /etc/gitea/app.ini
Restart=always
Environment=USER=git HOME=/home/git GITEA_WORK_DIR=/var/lib/gitea

[Install]
WantedBy=multi-user.target
确保查看文件并了解选项。例如,如果您决定使用MySQL,则需要取消注释该部分。现在,要为设置服务并验证它正在运行的最后一步:
$ sudo cp gitea.service /etc/systemd/system/gitea.service
$ sudo systemctl start gitea.service
$ sudo systemctl status gitea.service
● gitea.service - Gitea (Git with a cup of tea)
     Loaded: loaded (/etc/systemd/system/gitea.service; disabled; vendor preset: enabled)
     Active: active (running) since Fri 2023-07-14 06:00:51 CDT; 6s ago
   Main PID: 5457 (gitea)
      Tasks: 21 (limit: 18997)
     Memory: 116.6M
     CGroup: /system.slice/gitea.service
             └─5457 /usr/local/bin/gitea web --config /etc/gitea/app.ini
Gitea配置
启动之前,我们需要在Gitea将绑定到的IP地址上获取信息。为了获得IP,您需要此目的:
$ sudo apt-get install net-tools
$ ifconfig eth0
其中eth0是您的主要适配器(对于WiFi而言,这可能会有所不同)。然后只需查找inet值即可。现在,服务器名称是GIT结帐之类的内容。由于我在本地运行了很多事情,因此我倾向于将服务标记为特定的主机(也使SSH密钥验证更易于管理)。您只需要添加到相应的主机文件:
[eth0 inet value here] gitea
作为我的一个例子:
172.18.139.193 gitea
我将此地址称为整个指南的网络IP。主机文件是大多数 *NIX系统上的/etc/hosts,或者是Windows Systems的c:\Windows\system32\drivers\etc\hosts上是您计划使用的任何系统上的Windows Systems。然后将您的浏览器引导到http://gitea:3000应该提出Gitea Web安装程序和整体Web配置。填写最重要的是数据库凭据:
- 数据库类型:PostgreSQL
- 主机:/var/run/postgresql/
- 用户名:gitea
- 密码:您为该用户设置的任何密码
- 数据库名称:GiteadB
- ssl:禁用(这是本地实例,所以这并不是什么问题,但是您肯定希望启用此功能的生产部署)
- 模式:留空
- 服务器名称:gitea
- Gitea Base URL: http://172.18.139.193:3000
基本URL就是这种方式,因为Python包装相互作用需要与Gitea Action正确使用。您仍然可以通过http://gitea:3000/地址访问,只是系统可能会向您投掷无知的红色横幅。请注意,如果您将Jenkins用作CI/CD,则可以将http://gitea:3000/作为Gitea Base URL逃脱。我还启用更新检查器。安全明智的是它确实连接到gitea.io,因此,如果您在生产/安全环境中进行此操作,则可能希望离开此禁用。接下来,扩展“管理员帐户设置”,并填写用户名和密码的详细信息。如果您不这样做,则将默认为第一个用户登录。填写所有内容后,您应该向您提供类似的屏幕:
现在,我们还需要返回权限以读取配置文件,因为设置已完成:
$ sudo chmod 750 /etc/gitea
$ sudo chmod 640 /etc/gitea/app.ini
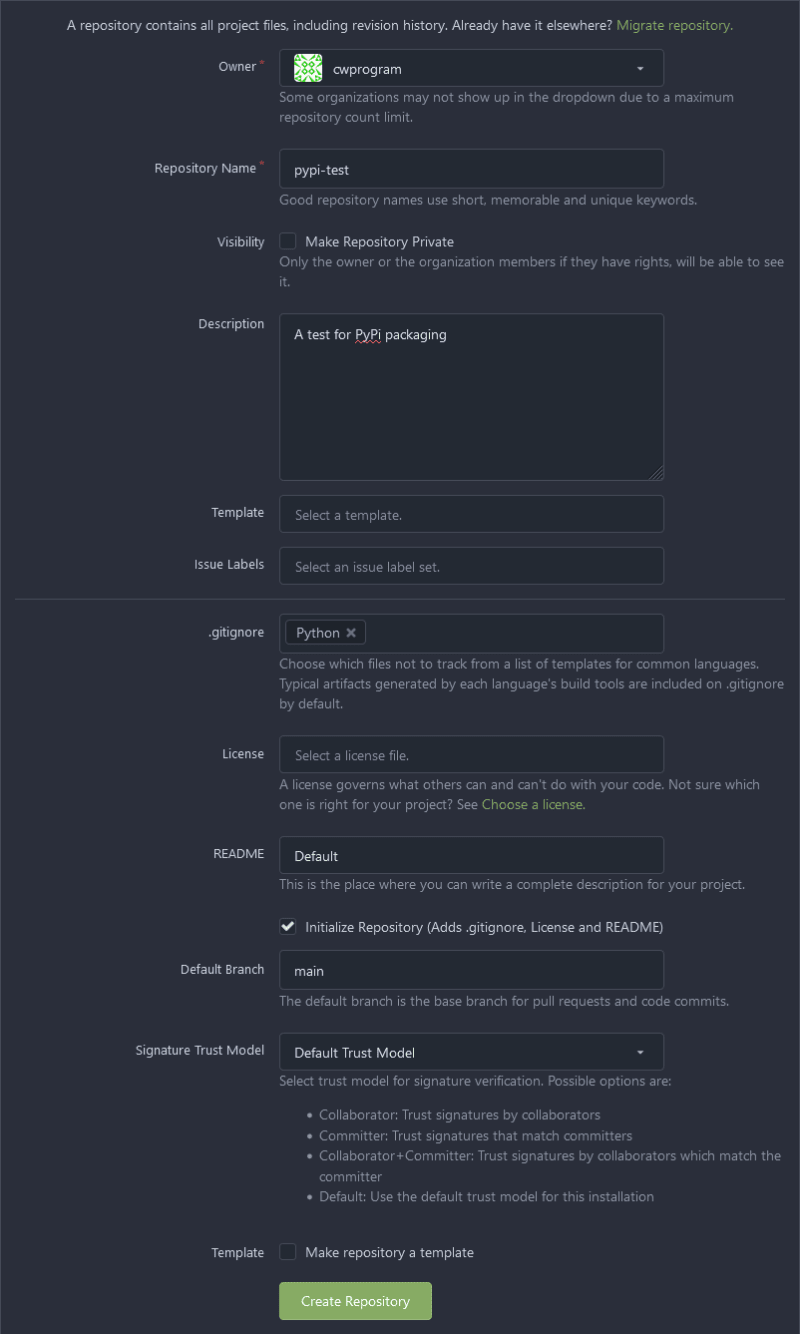
现在,单击存储库旁边的 +标志以创建一个新的。所有者组织最终将成为您创建的管理用户:
我的存储库名称为pypi-test,带有合适的描述。当我们与Python合作时,Python设置为.gitignore。其他所有内容均为默认值,这意味着我们可以使用“创建存储库”来完成。完成此操作后,您应该看到类似的存储库屏幕:
接下来要做的事情是添加SSH键,类似于它在GitHub上的工作方式,因此SSH身份验证有效。只需导航到http://gitea:3000/user/settings/keys即可开始设置。如果您已经在GitHub或任何其他服务上拥有SSH键,则可以跳过密钥生成步骤。最好的练习明智的服务是独立的服务密钥是理想的选择。因此,我将生成SSH键:
$ ssh-keygen -t ed25519 -C "your@email.com"
Generating public/private ed25519 key pair.
Enter file in which to save the key (/home/cwprogram/.ssh/id_ed25519): /home/cwprogram/.ssh/id_gitea
Created directory '/home/cwprogram/.ssh'.
Enter passphrase (empty for no passphrase):
Enter same passphrase again:
Your identification has been saved in /home/cwprogram/.ssh/id_gitea
您需要相应地量身定制钥匙和电子邮件的路径。完成此操作后,只需单击Gitea接口中右侧的“添加键”,输入一个键名,然后将其粘贴到您的公共密钥中(添加了带有.pub的密钥文件的位置)。然后单击“添加键”。将需要将条目添加到~/.ssh/config中,因此我们不需要每次添加身份文件选项:
Host gitea
    User git
    IdentityFile ~/.ssh/id_gitea
    IdentitiesOnly yes
现在我要结帐:
$ git clone git@gitea:cwprogram/pypi-test.git
Cloning into 'pypi-test'...
remote: Enumerating objects: 4, done.
remote: Counting objects: 100% (4/4), done.
remote: Compressing objects: 100% (3/3), done.
remote: Total 4 (delta 0), reused 0 (delta 0), pack-reused 0
Receiving objects: 100% (4/4), done.
在回购视图上,您可以通过单击此区域的“ SSH”选项卡并复制值:
来获取特定的git URL:回购人口
当前的存储库中没有太多,所以我会以前提前并使用我以前使用过的example repo:
$ git clone https://github.com/tomchen/example_pypi_package.git
$ cd example_pypi_package/
$ git archive main | tar -x -C ../pypi-test/
$ cd ../pypi-test/
git archive本质上是为我提供所有文件,而没有.git信息。我会继续删除我不需要的东西,然后添加其余文件:
$ rm -rf .github .vscode vscode.env
$ git add .
$ git status
On branch main
Your branch is up to date with 'origin/main'.

Changes to be committed:
  (use "git restore --staged <file>..." to unstage)
        new file:   .editorconfig
        modified:   .gitignore
        new file:   LICENSE
        new file:   MANIFEST.in
        modified:   README.md
        new file:   pyproject.toml
        new file:   setup.cfg
        new file:   setup.py
        new file:   src/examplepy/__init__.py
        new file:   src/examplepy/module1.py
        new file:   tests/__init__.py
        new file:   tests/test_module1.py
        new file:   tox.ini
请注意,我只对这样的初始设置进行git add .,并建议对其他提交进行明确的文件名列表。这样可以防止意外地提出您没有期望的事情。现在进行提交和推动:
$ git commit -m "Initial Commit"
$ git push origin main
Enumerating objects: 21, done.
Counting objects: 100% (21/21), done.
Delta compression using up to 32 threads
Compressing objects: 100% (15/15), done.
Writing objects: 100% (18/18), 8.53 KiB | 8.53 MiB/s, done.
Total 18 (delta 1), reused 0 (delta 0), pack-reused 0
remote: . Processing 1 references
remote: Processed 1 references in total
To gitea:cwprogram/pypi-test.git
   b07d3cd..bb01067  main -> main
在Gitea Web界面上进行验证,我们可以看到推动推向后端:
Gitea Runner设置
在进一步前进之前,我想注意Gitea的行动正在开发中。它们本来应该与GitHub的行动和相关的第三方行动兼容,但目前尚未100%的保证。如果这是您关注的问题,您可能会考虑一个自托管的Jenkins解决方案。
为了将CI/CD与gitea一起使用,我们需要主动gitea操作,并让跑步者可用来处理请求。这将需要在Gitea配置中启用并重新启动以使更改活动:
$ sudo su git -
$ vim /etc/gitea/app.ini
<at bottom of file>
[actions]
ENABLED=true
$ exit
$ sudo systemctl restart gitea.service
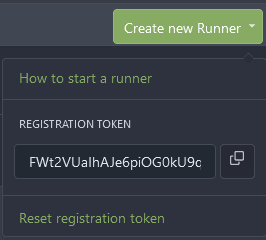
下一个要求是让代理运行。如果您处于默认安装或应用命名域中,请访问http://gitea:3000/admin/runners。单击“创建新跑步者”,将带来看起来像这样的下拉列表:
这将为跑步者提供验证连接性的注册代码。您可以在代码右侧使用剪贴板图标并将其保存在某个临时位置。我会选择Docker容器来处理代理商,以便它们相当孤立。 Docker安装指南具有setting up Docker for Ubuntu上的说明,因此我不会对此深入研究。我要做的一个更改是将Docker作为TCP服务,以使网络更容易:
$ sudo cp /lib/systemd/system/docker.service /etc/systemd/system/
$ sudo sed -i 's/\ -H\ fd:\/\//\ -H\ fd:\/\/\ -H\ tcp:\/\/127.0.0.1:2375/g' /etc/systemd/system/docker.service
$ sudo systemctl daemon-reload
$ sudo systemctl restart docker.service
启动之前,您还需要将常规用户添加到Docker组,否则会丢弃许可错误:
$ sudo usermod -a -G docker cwprogram
用您预定的Sudo用户替换cwprogram。然后,您需要在用户时重新使用以应用组更改。现在是使用Runner Client运行容器的问题:
$ docker run -d --add-host gitea:host-gateway -e GITEA_INSTANCE_URL=http://172.18.139.193:3000 -e GITEA_RUNNER_REGISTRATION_TOKEN=FWt2VUaIhAJe6piOG0kU9qsi5cKIem1n6g0l40aD -v /var/run/docker.sock:/var/run/docker.sock --name gitea_runner gitea/act_runner
gitea_instance_url与我们在Web设置中的URL相同。这样做使与跑步者的联网操作变得更加容易。 --add-host gitea:host-gateway之所以完成,是因为gitea是将在跑步者上完成的GIT结帐域。这告诉它直接到SSH服务器所在的容器主机,因此容器可以正确执行SSH结帐。请注意,尽管gitea/act_runner:nightly是由我发现:latest更稳定的文档提出的。跑步者列出您创建注册令牌的位置,现在应以闲置显示跑步者:
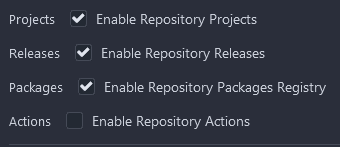
我们还需要在存储库中启用操作。如果您转到存储库的设置页面,将有一个选项启用操作:
现在要继续并将以下文件放在存储库根中:
name: Gitea Actions Demo
run-name: ${{ gitea.actor }} is testing out Gitea Actions 🚀
on: [push]

jobs:
  Explore-Gitea-Actions:
    runs-on: ubuntu-latest
    steps:
      - run: echo "🎉 The job was automatically triggered by a ${{ gitea.event_name }} event."
      - run: echo "🐧 This job is now running on a ${{ runner.os }} server hosted by Gitea!"
      - run: echo "🔎 The name of your branch is ${{ gitea.ref }} and your repository is ${{ gitea.repository }}."
      - name: Check out repository code
        uses: actions/checkout@v3
      - run: echo "💡 The ${{ gitea.repository }} repository has been cloned to the runner."
      - run: echo "🖥️ The workflow is now ready to test your code on the runner."
      - name: List files in the repository
        run: |
          ls ${{ gitea.workspace }}
      - run: echo "🍏 This job's status is ${{ job.status }}."
然后将其推到gitea:
$ git add .gitea/workflows/deploy.yaml
$ git commit -m "Adding example actions file"
$ git push origin main
如果您查看“存储库视图”中的“动作”选项卡,我们可以看到部署成功:
跑步者的最终说明是,如果您在容器上进行码头站以免费资源,则可以进行Docker启动,并且可以再次作为代理使用。如果您将其销毁或从头开始创建新代理,则需要为跑步者获得新的注册代码。
Python软件包部署
由于此软件包是一个示例PYPI软件包,因此我们将创建一条管道,将其部署到Gitea内置的package hosting功能中。首先,我们需要进行身份验证才能部署。现在,对于标准生产部署,您需要创建一个服务帐户来管理CI/CD访问。但是,由于这只是一个个人实例,我将继续使用我的帐户中的个人令牌。导航到用户设置的“应用程序”(http://gitea:3000/user/settings/applications)选项卡,并在“管理访问令牌”下展开“选择范围”:
对于范围,我们只需要读取和包装包装,因为发布就是我们目前打算做的。选择“生成令牌”后,它将以蓝色横幅显示。确保将其保持在某个地方安全,因为一旦您导航,就无法恢复令牌,并且必须从头开始创建一个新的。现在是时候将此钥匙设置为秘密了。为了简化Python软件包部署的未来需求,我将继续在用户级别上执行此操作。您还可以将其范围范围范围范围范围,或者创建组织并将其范围范围范围。因此,导航到用户的秘密页面(http://gitea:3000/user/settings/secrets)。单击“添加秘密”将显示:
输入令牌名称,然后将其粘贴到以前生成的值的令牌中。重要的是要注意,作为秘密意味着它在过程中被解密为纯文本形式。这就是为什么范围访问如此重要的原因。虽然当然仍然不容易解密,所以要考虑安全实践是可以考虑的。现在完成此操作了,是时候修改.gitea/workflows/deploy.yaml文件以部署到Gitea软件包了:
name: PyPi Gitea Actions Deploy
run-name: PyPi deploy
on: [push]

jobs:
  Deploy-PyPi:
    runs-on: ubuntu-latest
    steps:
      - name: Check out repository code
        uses: actions/checkout@v3
      - name: Apt update
        run: apt-get update
      - name: Setup Python
        run: apt-get install -y python3 python3-pip python3-venv
      - name: Build Python Package
        run: |
          pip3 install twine build
          python3 -m build --sdist --wheel .
      - name: Publish package to Gitea Packages
        env:
          TWINE_USERNAME: ${{ gitea.repository_owner }}
          TWINE_PASSWORD: ${{ secrets.PYPI_DEPLOY_TOKEN }}
        run: python3 -m twine upload --repository-url  "${{ env.GITHUB_SERVER_URL }}/api/packages/${{ gitea.repository_owner }}/pypi" dist/*
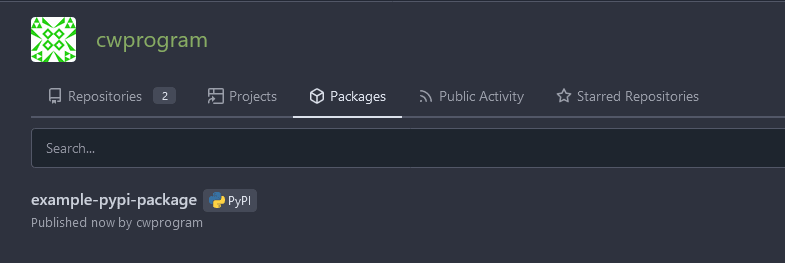
python和pip以及VENV以及构建模块的工作。然后安装了麻线(包装上传)和构建(分发构建)。 build将生成二进制分布和包装的轮子。环境是用于用户名和密码的设置,因此Twine上传命令较短。存储库的所有者是上传到私人存储库所需的用户。尽管有env.GITHUB_SERVER_URL命名,但它指向GITEA_INSTANCE_URL传递给跑步者。这样做是为了提高与GitHub动作的兼容性。查看我用户的包装页面:
现在要安装私人回购,使用PIP_INDEX_URL环境变量的PIP用于安装私人软件包:
name: PyPi Gitea Actions Deploy
run-name: PyPi deploy
on: [push]

jobs:
  Deploy-PyPi:
    runs-on: ubuntu-latest
    steps:
      - name: Check out repository code
        uses: actions/checkout@v3
      - name: Apt update
        run: apt-get update
      - name: Setup Python
        run: apt-get install -y python3 python3-pip
      - name: Private PyPi install package
        env:
          URL_USER: ${{ gitea.repository_owner }}
          URL_PASSWORD: ${{ secrets.PYPI_DEPLOY_TOKEN }}
          URL_PATH: "api/packages/${{ gitea.repository_owner }}/pypi/simple"
        run: |
          export URL_BASE=${{ env.GITHUB_SERVER_URL }}
          export DOMAIN=${URL_BASE/http\:\/\//}
          export DOMAIN_NO_PORT=$(echo $DOMAIN | sed -e 's|:.*$||')
          PIP_INDEX_URL="http://$URL_USER:$URL_PASSWORD@$DOMAIN/$URL_PATH" pip3 install --trusted-host $DOMAIN_NO_PORT --no-deps example-pypi-package
env设置变量供我们使用,以使命令及其参数易于阅读的方式进行处理。 URL_BASE只是GITEA_INSTANCE_URL值。然后,DOMAIN使用删除HTTP,因为我们将进行基本身份验证,看起来像:
http://user:password@domain:port/
,由于我们不仅有一个IP地址,因此我们需要剥离http://才能进行这项工作。 DOMAIN_NO_PORT由于实例流量超过HTTP而需要将私有存储库添加到--trusted-host(即使是https自签名仍然需要此)。在提交和推动代码后查看操作部分显示一切有效:
结论
我会说这可能是我从事的最耗时的文章之一。我的一般共识是,与GIT相关的零件非常适合部署(例如部署),但是使用本地Jenkins安装诸如CI/CD管道之类的东西会更好。 Gitea行动还需要大量时间才能稳定足够的时间,以成为使用GitHub Actions的团队的过渡点。 PYPI软件包服务是一个很好的补充,尽管我希望PIP安装自定义存储库更易于使用。

