关于铁路以及我们要解决的问题
Railway改变了如何构建任何辅助项目(以及将来的启动!)。构建软件的最好的事情之一就是编写代码并解决您预期的问题。但是很多时候,我觉得我正在为AWS或GCP搏斗配置,以使事情以自动化的方式工作。那是在构建实际应用程序中遗漏的时间。
铁路为我改变了这一点。像数据库这样的部署和添加资源是无缝且无服务器的。很长一段时间以来,我对新产品并没有感到兴奋。这就是为什么我决定写这篇博客文章的原因。当前,铁路没有本机对象存储,因此我想分享一种为您的项目使用某种对象存储的方法。这是我至少可以为他们的慷慨的免费层次做。
先决条件和设置。
-
您有一个Google云帐户,您可以在此处使用Gmail帐户注册。Google Cloud
为什么要Google Cloud?好吧,我认为有很多S3和AWS指南尝试尝试不同的东西。 (如果您对AWS指南感兴趣,请告诉我!) -
您有一个Railway.app帐户。他们的自由层真的很慷慨,应该足以本指南。
-
我喜欢使用铁路的方式是连接到从GitHub到它的现有项目。在这种情况下,是对象存储铁路项目https://github.com/ralaruri/object-storage-railway。每次推动公关时
-
如果您想跳过指南,请查看此处的存储库,可以在您的个人帐户中部署到铁路。 https://github.com/ralaruri/object-storage-railway
Google云设置
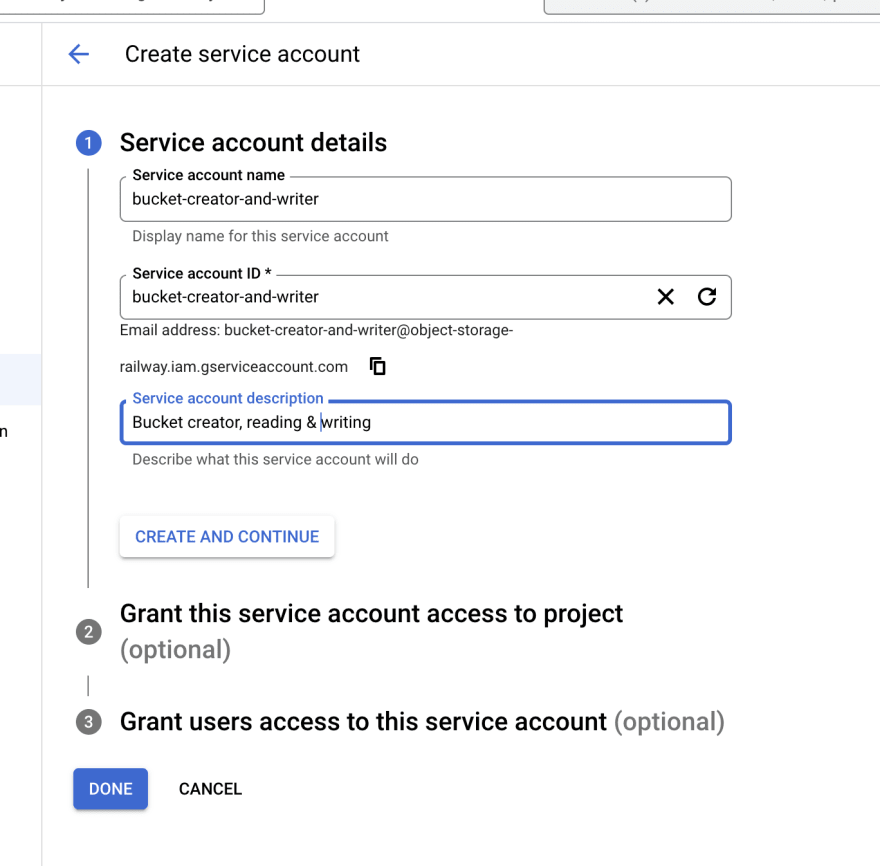
我们将创建一个项目和服务帐户,以便在项目中访问我们的代码,以创建,写入,删除和更新数据以及数据。
-
创建一个新项目或使用您在UI中拥有的当前项目。我为本指南创建了一个名为
object-storage-railway
的临时项目
-
将权限添加到您的服务帐户:(请记住,请给予最少所需的访问权限,即读取,写作和创建存储桶)在本指南中,我将保持简单并允许其
storage admin访问权限。这使其可以创建,更新,读取,写入和删除存储。转到Permissions

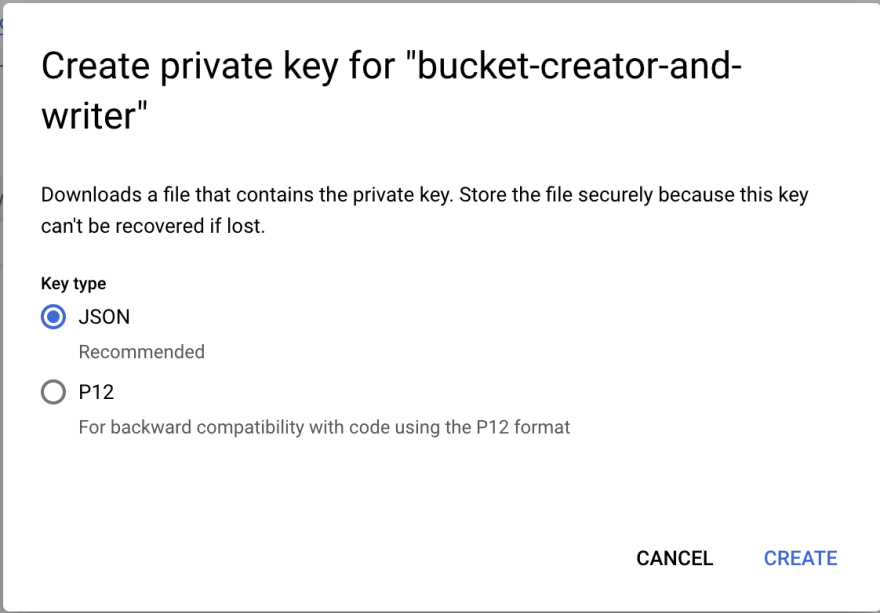
- 创建一个私人JSON密钥并在本地下载。 不要公开向您的github承诺,也不要在本指南中分享的任何地方分享我已删除这些内容,并且不再有效的测试帐户!
在本地或铁路上设置服务帐户。
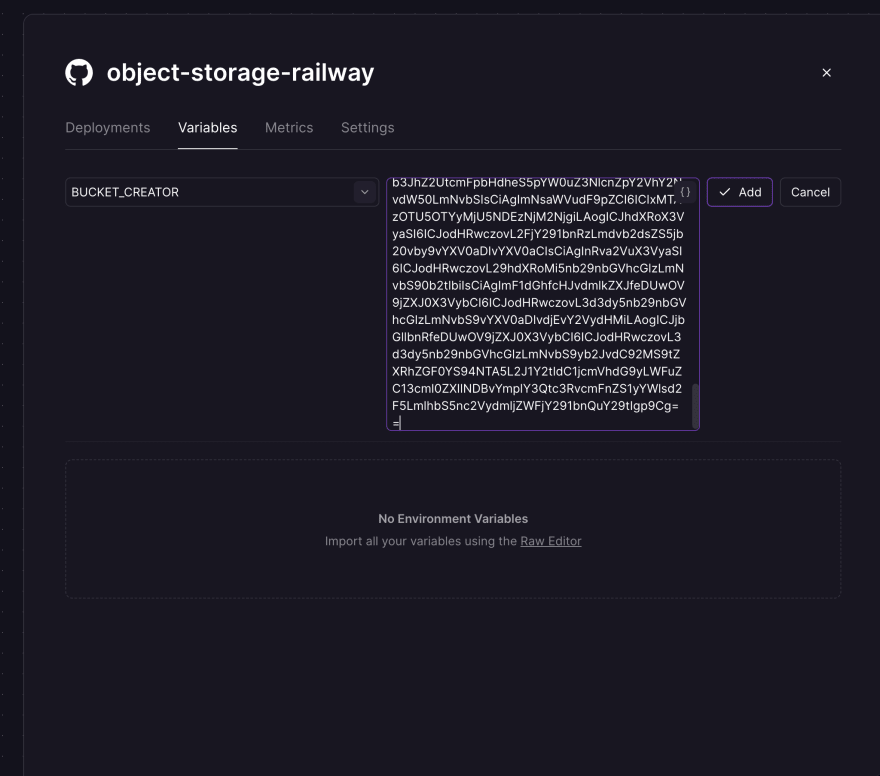
- 将您的JSON键文件转换为base64键。在您的终端
cat object-storage-railway-f5a8a25dd590.json|base64中使用此功能,它将再次返回base64键再次不公开露面,这是该博客文章目的的演示帐户,并且已经被删除。保存输出
这使我们可以将代码保存在本地或铁路可变存储中的项目中,并根据需要在运行时进行解码。
base64在bucket_creater.go文件的一部分中解码。
func CovertStringToJSON(env_details string) []byte {
    decoded_json, err := base64.StdEncoding.DecodeString(env_details)
    if err != nil {
        panic(err)
    }

    return decoded_json

}
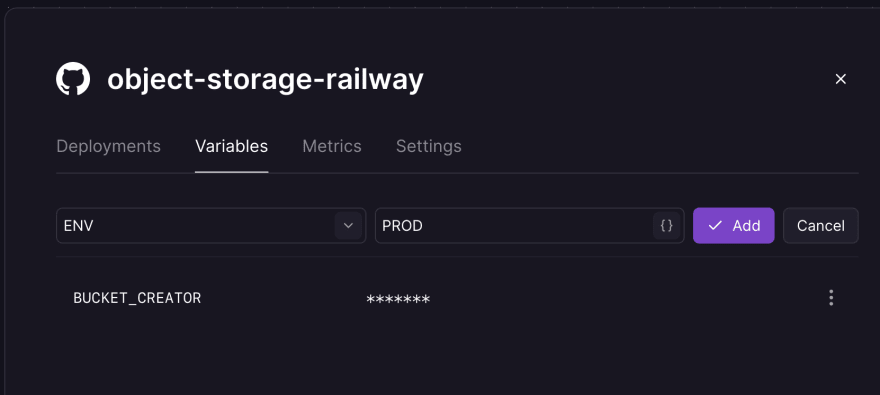
- 对于您的项目,您可以在此处访问变量,我们将在我们的铁路项目中添加编码的base64密钥作为变量。
此外,您还需要创建一个称为ENV=PROD的变量,这使我们可以将铁路用作生产环境,在本地,我们可以使用.env,如果我们选择。
了解代码:
- 建立与GCP的连接 我们正在使用Google Cloud库,请 根据您在本地运行或在铁路上使用的是,我们使用.env使用本地变量或铁路上的变量。这使我们可以在本地测试。
此客户端是使用任何GCP服务在我们的情况下使用我们用来创建,读写到存储桶的基础方法。
在create_bucket.go中:
func clientConnection() *storage.Client {
    ctx := context.Background()

    // Set up credentials to authenticate with Google Cloud
    var bucketVar string

    if env := os.Getenv("ENV"); env != "PROD" {
        bucketVar = utils.GoDotEnvVariable("./.env", "BUCKET_CREATOR")
    } else {
        bucketVar = os.Getenv("BUCKET_CREATOR")
    }

    new_creds := CovertStringToJSON(bucketVar)
    creds := option.WithCredentialsJSON(new_creds)

    // Create a client to interact with the Google Cloud Storage API
    client, err := storage.NewClient(ctx, creds)
    if err != nil {
        log.Fatalf("Failed to create client: %v", err)
    }

    return client

}
- 创建一个存储桶
我们现在可以使用客户端连接创建一个存储桶,仅提供存储桶名和我们正在使用的项目。
在create_bucket.go中:
func CreateBucket(projectID string, bucketName string) {

    ctx := context.Background()

    client := clientConnection()

    // Create a new bucket in the given project with the given name if the bucket
    // already exists then it will just print (bucket already exists)
    if err := client.Bucket(bucketName).Create(ctx, projectID, nil); err != nil {
        fmt.Printf("Failed to create bucket %q: %v", bucketName, err)
    }

    fmt.Printf("Bucket %q created.\n", bucketName)
}
在main.go中:
buckets.CreateBucket("object-storage-railway", "food-bucket-dev")
- 阅读和写入数据
我们有两个操作员,我们关心写作和阅读。因此,这两个函数以存储桶的名称和您正在写入数据的数据的文件路径。您可以更改要在存储桶中写入的文件路径,它在读取文件时不需要匹配文件路径。
在bucket_operator.go中:
func WriteToBucket(bucket_name string, file_path string) {

    ctx := context.Background()

    // Set up credentials to authenticate with Google Cloud

    client := clientConnection()

    bucketName := bucket_name
    filePath := file_path

    file, err := os.Open(filePath)

    if err != nil {
        log.Fatalf("Failed to open file: %v", err)

    }

    defer file.Close()

    // timestamp the file
    today := time.Now().Format("2006_01_02")

    // write the date part of the file path name
    filePath = fmt.Sprintf("%s_%s", today, filePath)

    // Create a new writer for the file in the bucket
    writer := client.Bucket(bucketName).Object(filePath).NewWriter(ctx)

    // Copy the content
    if _, err := io.Copy(writer, file); err != nil {
        log.Fatalf("Failed to write file to bucket: %v", err)
    }

    // Close the writer to flush the contents to the bucket
    if err := writer.Close(); err != nil {
        log.Fatalf("Failed to close writer %v", err)

    }

    log.Printf("File %q uploaded to bucket %q. \n", filePath, bucketName)

}
注意日期当前是硬编码,需要更改。
在main.go中:
buckets.WriteToBucket("food-bucket-dev", "cheese.json")
buckets.ReadFromBucket("food-bucket-dev","2023_03_12_cheese.json")
- 创建模拟数据:
目的是创建一些用于项目目的的模拟数据。我们创建了不同奶酪的json。
// write the cheeseMap to a json file
func WriteCheeseMapToJSONFile() {
    cheeseMap := map[int]string{100: "chedder", 200: "swiss", 300: "gouda", 400: "mozzarella"}
    // create a file
    file, err := os.Create("cheese.json")
    if err != nil {
        log.Fatal(err)
    }
    defer file.Close()

    // create a json encoder
    encoder := json.NewEncoder(file)
    encoder.SetIndent("", "  ")

    // write the cheeseMap to the file
    err = encoder.Encode(cheeseMap)
    if err != nil {
        log.Fatal(err)
    }
}

func DeleteJsonFile() {
    err := os.Remove("cheese.json")
    if err != nil {
        log.Fatal(err)
    }
}
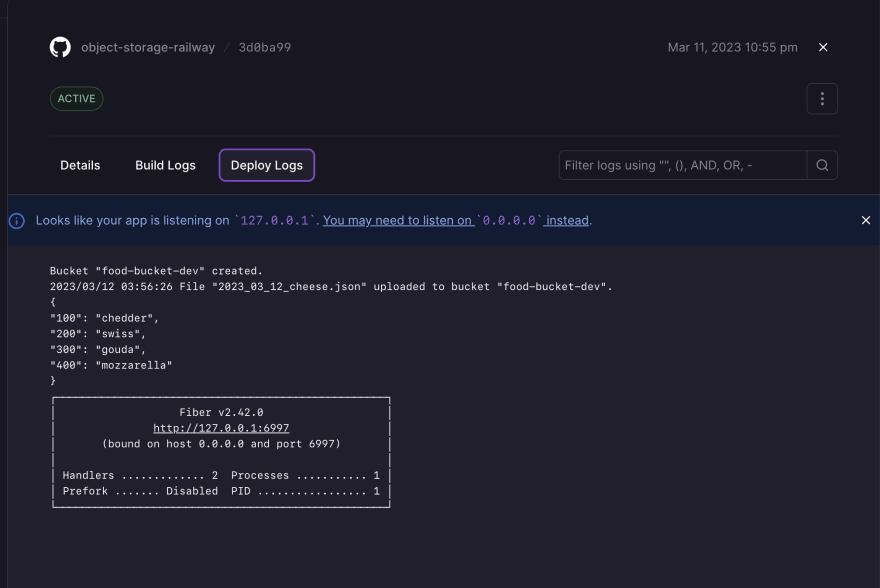
部署和检查部署
如前所述,在铁路中部署就像PR推送或手动单击项目上的部署按钮一样简单。
结论
现在,我们已经建立了一种设置对象存储的方法,您可以将其与铁路项目一起使用。我为一个个人项目创建了这个,我正在研究需要存储一些文件的地方。正如我之前提到的,我是铁路的忠实拥护者,并期待创建更多内容并与Railway上的所有人分享我的下一个个人项目!
如果您喜欢这篇文章,请告诉我!我很高兴使用不同的语言(Python,Typescript,甚至Rust!)
创建更多指南。
