欢迎来到的第四部分,了解可折叠设备。在本期中,我们最终将编码ð。我向您展示如何创建一个JetPack组成的应用程序,该应用程序尊重折叠和铰链,区分肖像和景观模式并利用大屏幕。这听起来像是一项艰巨的任务,对吧?
它不会是一个。
设置
要获取有关折叠和铰链的信息,我们将使用Jetpack WindowManager。像往常一样,库将作为实施依赖性添加到项目中。
dependencies {
  ...
  implementation "androidx.window:window:1.1.0-alpha04"
}
您会看到的,只有两个功能windowLayoutInfo()和computeCurrentWindowMetrics()提供了我们需要的所有数据。这是调用它们的方式:
class FoldableDemoActivity : ComponentActivity() {
  @OptIn(ExperimentalMaterial3Api::class)
  override fun onCreate(savedInstanceState: Bundle?) {
    super.onCreate(savedInstanceState)
    lifecycleScope.launchWhenResumed {
      setContent {
        val layoutInfo by WindowInfoTracker.getOrCreate(this@FoldableDemoActivity)
          .windowLayoutInfo(this@FoldableDemoActivity).collectAsState(
            initial = null
          )
        val windowMetrics = WindowMetricsCalculator.getOrCreate()
          .computeCurrentWindowMetrics(this@FoldableDemoActivity)
        MaterialTheme(
          content = {
            Scaffold(
              topBar = {
                TopAppBar(title = {
                  Text(stringResource(id = R.string.app_name))
                })
              }
            ) { padding ->
              Content(
                layoutInfo = layoutInfo,
                windowMetrics = windowMetrics,
                paddingValues = padding
              )
            }
          },
          colorScheme = if (isSystemInDarkTheme())
            darkColorScheme()
          else
            lightColorScheme()
        )
      }
    }
  }
}
在此代码段中,似乎有很多事情正在进行。但这实际上真的很直截了当。 setContent { }接收了我们组成的UI的根,一个MaterialTheme()(带有颜色的颜色为浅色和深色模式),其中包含一个包含TopAppBar()和我们的Content()的Scaffold()。由于windowLayoutInfo()返回流动,我们与lifecycleScope.launchWhenResumed()启动了Coroutine。
那并不难,对吗?下一个也不会。
@Composable
fun Content(
  layoutInfo: WindowLayoutInfo?,
  windowMetrics: WindowMetrics,
  paddingValues: PaddingValues
) {
  val foldDef = createFoldDef(layoutInfo, windowMetrics)
  BoxWithConstraints(
    modifier = Modifier
      .fillMaxSize()
      .padding(paddingValues = paddingValues)
  ) {
    if (foldDef.hasFold) {
      FoldableScreen(
        foldDef = foldDef
      )
    } else if (foldDef.windowSizeClass.windowWidthSizeClass == WindowWidthSizeClass.EXPANDED) {
      LargeScreen(
        foldDef = foldDef
      )
    } else {
      SmartphoneScreen(
        foldDef = foldDef
      )
    }
  }
}
Content()基本上是一个调度员(当然不是coroutines的意义)。它查看layoutInfo: WindowLayoutInfo?和windowMetrics: WindowMetrics以确定设备类型,然后调用FoldableScreen(),LargeScreen()或SmartphoneScreen()。请注意,我包装了BoxWithConstraints()中的调用可复合的,因为该功能提供了有关其内容约束的一些信息(您可能想利用它)。
在查看三个设备类型屏幕之前,让我们简要介绍FoldDef。
data class FoldDef(
  val hasFold: Boolean,
  val foldOrientation: FoldingFeature.Orientation?,
  val foldWidth: Dp,
  val foldHeight: Dp,
  val widthLeftOrTop: Dp,
  val heightLeftOrTop: Dp,
  val widthRightOrBottom: Dp,
  val heightRightOrBottom: Dp,
  val isPortrait: Boolean,
  val windowSizeClass: WindowSizeClass,
)
该类保存有关折叠或铰链的信息,例如其方向和大小。它将差距的左侧和右侧的区域的尺寸存储,这是您的应用UI所居住的地方。
这是获得FoldDef的数据:
@Composable
fun createFoldDef(
  layoutInfo: WindowLayoutInfo?,
  windowMetrics: WindowMetrics
): FoldDef {
  var foldOrientation: FoldingFeature.Orientation? = null
  var widthLeftOrTop = 0
  var heightLeftOrTop = 0
  var widthRightOrBottom = 0
  var heightRightOrBottom = 0
  var foldWidth = 0
  var foldHeight = 0
  layoutInfo?.displayFeatures?.forEach { displayFeature ->
    (displayFeature as FoldingFeature).run {
      foldOrientation = orientation
      if (orientation == FoldingFeature.Orientation.VERTICAL) {
        widthLeftOrTop = bounds.left
        heightLeftOrTop = windowMetrics.bounds.height()
        widthRightOrBottom = windowMetrics.bounds.width() - bounds.right
        heightRightOrBottom = heightLeftOrTop
      } else if (orientation == FoldingFeature.Orientation.HORIZONTAL) {
        widthLeftOrTop = windowMetrics.bounds.width()
        heightLeftOrTop = bounds.top
        widthRightOrBottom = windowMetrics.bounds.width()
        heightRightOrBottom = windowMetrics.bounds.height() - bounds.bottom
      }
      foldWidth = bounds.width()
      foldHeight = bounds.height()
    }
  }
  return with(LocalDensity.current) {
    FoldDef(
      foldOrientation = foldOrientation,
      widthLeftOrTop = widthLeftOrTop.toDp(),
      heightLeftOrTop = heightLeftOrTop.toDp(),
      widthRightOrBottom = widthRightOrBottom.toDp(),
      heightRightOrBottom = heightRightOrBottom.toDp(),
      foldWidth = foldWidth.toDp(),
      foldHeight = foldHeight.toDp(),
      isPortrait = windowWidthDp(windowMetrics) / windowHeightDp(windowMetrics) <= 1F,
      windowSizeClass = WindowSizeClass.compute(
        dpWidth = windowWidthDp(windowMetrics = windowMetrics).value,
        dpHeight = windowHeightDp(windowMetrics = windowMetrics).value
      ),
      hasFold = foldOrientation != null
    )
  }
}
现在,这里是发生了很多事情。但是您不需要打扰,因为我为您做了所有计算。如果您很好奇,请随时挖掘。要充分理解代码,您需要查看两个功能:
@Composable
fun windowWidthDp(windowMetrics: WindowMetrics): Dp = with(LocalDensity.current) {
  windowMetrics.bounds.width().toDp()
}

@Composable
fun windowHeightDp(windowMetrics: WindowMetrics): Dp = with(LocalDensity.current) {
  windowMetrics.bounds.height().toDp()
}
他们以密度独立像素的窗口返回窗口的宽度和高度。
基于设备类型的内容
,但是现在让我们看一下设备类型屏幕。我们从传统智能手机开始。
@Composable
fun SmartphoneScreen(foldDef: FoldDef) {
  Box(
    modifier = Modifier.fillMaxSize(),
    contentAlignment = Alignment.Center
  ) {
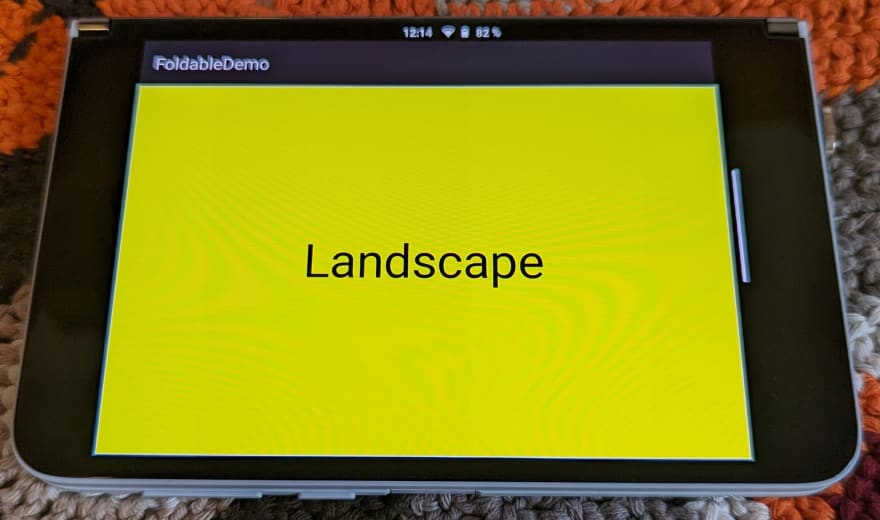
    YellowBox()
    PortraitOrLandscapeText(foldDef = foldDef)
  }
}
我对SmartphoneScreen()的实现显示了包含YellowBox()和PortraitOrLandscapeText()的Box()。您将在此处放置UI的主要内容。 App Bar已在onCreate()中设置。请注意,您的组合可以占用所有可用空间(modifier = Modifier.fillMaxSize())。
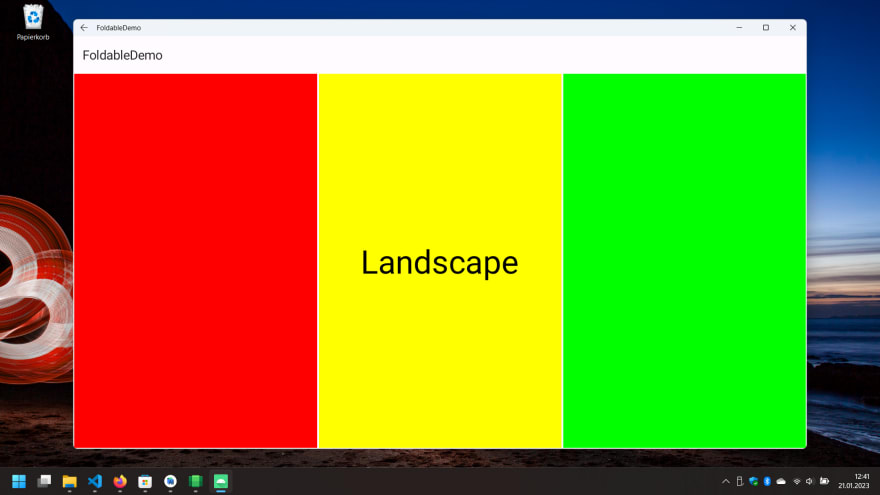
现在让我们转到大屏幕。实际上可以在Content()中调整大屏幕。我的实施只是这样做的:
if (foldDef.windowSizeClass.windowWidthSizeClass == WindowWidthSizeClass.EXPANDED) {
根据应用程序的布局(它要显示的内容),您可能需要添加其他条件。例如,如果设备处于肖像模式,则可能要查看windowHeightSizeClass。
@Composable
fun LargeScreen(foldDef: FoldDef) {
  Box(
    modifier = Modifier.fillMaxSize(),
    contentAlignment = Alignment.Center
  ) {
    Row(
      modifier = Modifier.fillMaxSize(),
    ) {
      val localModifier = Modifier
        .fillMaxHeight()
        .weight(0.333F)
      Box(modifier = localModifier) {
        RedBox()
      }
      Box(modifier = localModifier) {
        YellowBox()
      }
      Box(modifier = localModifier) {
        GreenBox()
      }
    }
    PortraitOrLandscapeText(foldDef)
  }
}
我的示例将Row()和PortraitOrLandscapeText()堆叠在Box()中,因此您可以看到实现多列布局的容易。如果您还记得本系列的前面部分,我强烈建议即使在大屏幕上也使用两个列,因此此代码更多地显示了我的方法的灵活性。像在SmartphoneScreen()中一样,您的组合可以利用所有可用空间(modifier = Modifier.fillMaxSize())。
最后,让我们来处理具有或没有阻塞的铰链的最高纪律,可折叠的设备:
@Composable
fun FoldableScreen(foldDef: FoldDef) {
  val hinge = @Composable {
    Spacer(
      modifier = Modifier
        .width(foldDef.foldWidth)
        .height(foldDef.foldHeight)
    )
  }
  val firstComposable = @Composable {
    RedBox()
  }
  val secondComposable = @Composable {
    GreenBox()
  }
  val container = @Composable {
    if (foldDef.foldOrientation == FoldingFeature.Orientation.VERTICAL) {
      Row(modifier = Modifier.fillMaxSize()) {
        Box(
          modifier = Modifier
            .fillMaxHeight()
            .width(foldDef.widthLeftOrTop)
        ) {
          firstComposable()
        }
        hinge()
        Box(
          modifier = Modifier
            .fillMaxHeight()
            .width(foldDef.widthRightOrBottom)
        ) {
          secondComposable()
        }
      }
    } else {
      Column(modifier = Modifier.fillMaxSize()) {
        Box(
          modifier = Modifier
            .fillMaxWidth()
            .weight(1.0F)
        ) {
          firstComposable()
        }
        hinge()
        Box(
          modifier = Modifier
            .fillMaxWidth()
            .height(foldDef.heightRightOrBottom)
        ) {
          secondComposable()
        }
      }
    }
  }
  container()
}
现在,这看起来更艰难,对吗?好消息是,您基本上可以重复使用所有代码,并仅替换firstComposable和secondComposable的内容。我们将在一分钟内查看它们。首先,让我们了解FoldableScreen()的作用。
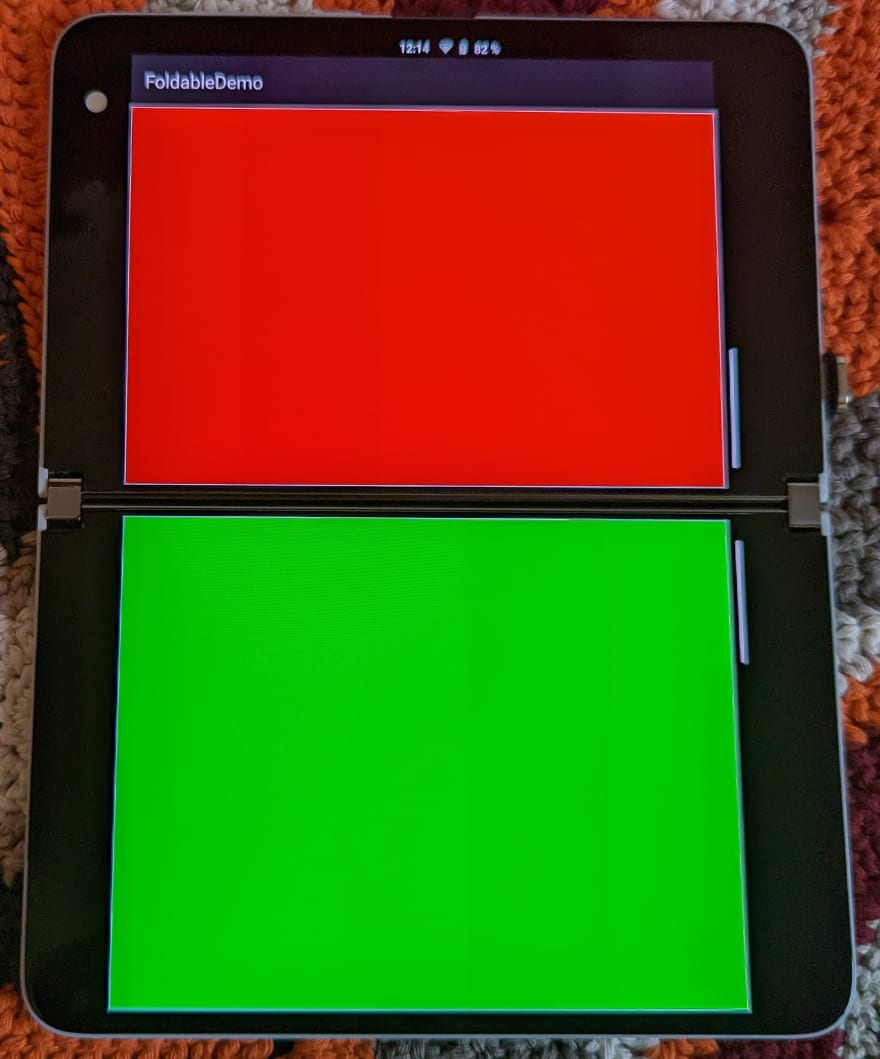
我们知道我们在可折叠的设备上。因此,我们检查折叠或铰链是水平还是垂直运行。垂直折叠意味着左侧和右侧有两个区域。水平褶皱意味着这些区域在折叠或铰链之上和下方。翻译成JetPack构成这意味着Row()或Column()。这个组合(container)收到三个孩子:
firstComposable-
hinge(我可能应该将其重命名为foldð) secondComposable
这些孩子的大小是根据foldDef: FoldDef的数据设置的。这就是为什么您的内容再次使用所有可用空间的原因。看看我的例子是什么:
@Composable
fun RedBox() {
  ColoredBox(
    modifier = Modifier
      .fillMaxSize(),
    color = Color.Red
  )
}

@Composable
fun YellowBox() {
  ColoredBox(
    modifier = Modifier
      .fillMaxSize(),
    color = Color.Yellow
  )
}

@Composable
fun GreenBox() {
  ColoredBox(
    modifier = Modifier
      .fillMaxSize(),
    color = Color.Green
  )
}
除了将不同的颜色传递给ColoredBox()外,这三个基本上都是相同的。
@Composable
fun ColoredBox(modifier: Modifier, color: Color) {
  Box(
    modifier = modifier
      .background(color)
      .border(1.dp, Color.White)
  )
}
ColoredBox()绘制了一个小的白色边框,以可视化组合能力真正显示出来。我称此可视化调试ðü。为了使代码完成,这是一个更合并的PortraitOrLandscapeText():
@Composable
fun PortraitOrLandscapeText(foldDef: FoldDef) {
  Text(
    text = stringResource(
      id = if (foldDef.isPortrait)
        R.string.portrait
      else
        R.string.landscape
    ),
    style = MaterialTheme.typography.displayLarge,
    color = Color.Black
  )
}
这将结束代码演练。您可以找到该项目on GitHub。
包起来
如您所见,支持折叠板和大型屏幕设备没什么大不了的。至少,如果您使用我的代码段。我真的邀请您参加,因为它们是完全免费的,可以在您选择的任何许可下使用。我感谢归因,但这不是必需的。因此,实际上没有任何借口无法正确支撑可折叠和大屏幕设备。
在以下一部分中,将结束本系列,我们将研究 canonical布局以及它们如何影响您今天看到的代码。请继续关注。
除非说明所有图像(c)thomasKã¼nnne
,除非


