介绍
在上一篇文章中,我们查看了Python script to query available names across Azure resources [5]。该脚本使用Azure Resource Graph在运行脚本的主体范围的所有订阅范围内找到具有给定名称的资源[6]。在这篇文章中,我们将使用Azure函数使用Managed Identity来运行此脚本,该Managed Identity具有相应的Reader角色,以某个范围[7]。
重要的
本文包含一些用于测试和播放python的代码。
此处介绍的代码不得在生产环境中使用,因为它缺乏重要功能,例如安全设置,日志记录,错误处理等。它仅用于测试和学习。
测试后应立即删除资源以避免成本。
另外,该代码正在利用Python v2 programming model in Azure Functions,目前在预览中 [1]。
建立Azure基础设施
我们正在使用terraform and the corresponding azurerm provider来构建Azure函数应用程序的Azure基础架构[2]。 Terraform代码也位于GitHub Repository中。
请参阅您选择的系统上的Terraform documentation if you need details on how to install terraform itself [9]。
需要的资源:
- 存储帐户
- 应用程序服务计划
- 功能应用程序
- 应用Insights
Terraform代码
Terraform提供商
文件:provider.tf
至于提供商块,只需要azurerm提供商。
terraform {
  required_providers {
    azurerm = {
      source = "hashicorp/azurerm"
    }
  }
}

provider "azurerm" {
  features {}
}
资源组
在此示例中,我们将使用West Europe区域 - 但是,可以将其修改为最适合的区域。随后创建的资源将简单地参考资源组区域,以确保将同一区域用于所有资源。
resource "azurerm_resource_group" "rg" {
  location = "westeurope"
  name     = "{resource-group-name}"
  tags = {
    owner       = "me"
    environment = "test"
  }
}
存储帐户
文件:
Azure函数需要一个存储帐户,因为它们依靠Azure存储来进行操作,例如管理触发器和记录功能执行。请参阅Storage considerations for Azure Functions如果需要有关此主题的更多详细信息[3]。
resource "azurerm_storage_account" "storage_acct" {
  name                = "{storage-account-name}"
  resource_group_name = azurerm_resource_group.rg.name
  location            = azurerm_resource_group.rg.location

  account_kind             = "StorageV2"
  account_tier             = "Standard"
  account_replication_type = "LRS"
  access_tier              = "Hot"

  min_tls_version           = "TLS1_2"
  enable_https_traffic_only = true

  tags = {
    owner       = "me"
    environment = "test"
  }
}
由于我想在故障排除需要时检查主访问密钥,因此我将其添加为输出,但是,这不是必需的。如果添加,应出于明显的原因将其标记为sensitive = true。
output "sas_connection_string" {
  sensitive = true
  value     = azurerm_storage_account.storage_acct.primary_connection_string
}
如果我们想将其放到控制台上,我们可以使用此Terraform命令来执行此操作(成功部署后):
terraform output sas_connection_string
申请见解
为了记录目的,我们还在部署应用程序洞察力,这将使我们能够monitor executions in Azure Functions [4]。这将有助于故障排除。
resource "azurerm_application_insights" "func_app_insights" {
  name                = "{app-insights-name}"
  location            = azurerm_resource_group.rg.location
  resource_group_name = azurerm_resource_group.rg.name
  application_type    = "other"
}
功能应用程序(和应用程序服务计划)
文件:
由于我们正在运行Python代码,因此应用程序服务计划必须为os_type = "Linux"。此外,在此示例中,我们将其部署在Consumption Plan [8]中。这意味着它在Dynamic层中,因此我们需要在Terraform中使用sku_name = "Y1"配置。
当我们使用上述Python v2 programming model in Azure Functions时,重要的是我们将AzureWebJobsFeatureFlags = "EnableWorkerIndexing"添加到app_settings部分。此外,我们需要ENABLE_ORYX_BUILD = true和SCM_DO_BUILD_DURING_DEPLOYMENT = true-否则我们将无法使用Remote build功能[10]。
resource "azurerm_service_plan" "consumption_plan" {
  name                = "{service-plan-name}"
  location            = azurerm_resource_group.rg.location
  resource_group_name = azurerm_resource_group.rg.name
  os_type             = "Linux"
  sku_name            = "Y1"
}

resource "azurerm_linux_function_app" "naming_func" {
  name                       = "{function-app-name}"
  location                   = azurerm_resource_group.rg.location
  resource_group_name        = azurerm_resource_group.rg.name
  service_plan_id            = azurerm_service_plan.consumption_plan.id
  storage_account_name       = azurerm_storage_account.storage_acct.name
  storage_account_access_key = azurerm_storage_account.storage_acct.primary_access_key

  identity {
    type = "SystemAssigned"
  }

  app_settings = {
    ENABLE_ORYX_BUILD              = true
    SCM_DO_BUILD_DURING_DEPLOYMENT = true
    AzureWebJobsFeatureFlags       = "EnableWorkerIndexing"
    APPINSIGHTS_INSTRUMENTATIONKEY = azurerm_application_insights.func_app_insights.instrumentation_key
  }

  site_config {
    application_stack {
      python_version = "3.9"
    }
  }
}
最后,需要将功能应用程序托管身份分配给范围。为了进行测试,我将其添加为读者角色中的资源组范围,但是,如果我们想在多个订阅中检查可用名称,则必须将其添加到相应的订阅或管理组范围中。
resource "azurerm_role_assignment" "func_mi_assignment" {
  scope                = azurerm_resource_group.rg.id
  role_definition_name = "Reader"
  principal_id         = azurerm_linux_function_app.naming_func.identity[0].principal_id
}
部署
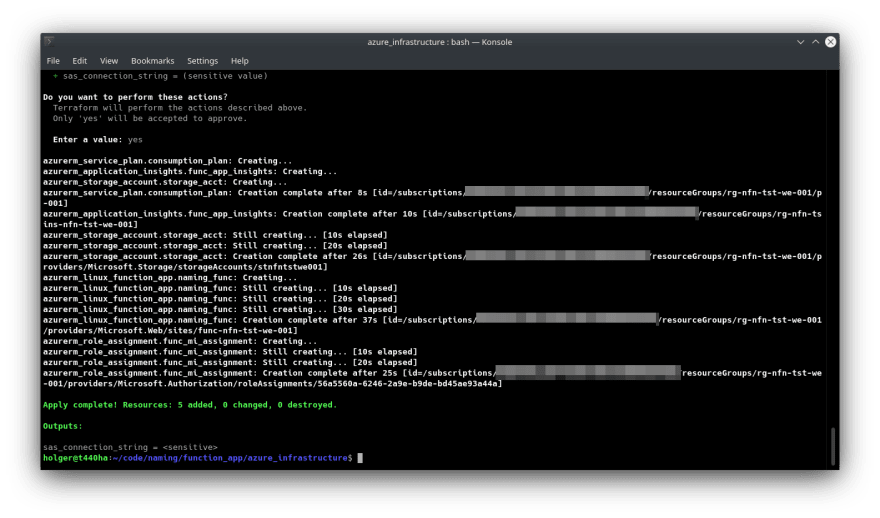
我们现在可以运行terraform init,terraform plan和terraform deploy。如果一切顺利,我们将让Terraform确认成功的部署。
使用Azure CLI,我们还可以确认资源是按预期存在的。
az resource list --resource-group {resource-group-name} --output table
创建功能应用程序
修改代码
首先,我们需要确保original Python script能够在Azure函数中运行,因为现在有一些不同的事情。
托管身份
在本地运行脚本时,我们只是使用azure.identity库中的AzureCliCredential类,该类将使用通过Azure CLI局部登录的用户的上下文。显然,这与托管身份无法使用。幸运的是,可以轻松地通过同一库的其他类别替换此部分:DefaultAzureCredential Class [11]。
因此,我们将导入以下库:
from azure.identity import DefaultAzureCredential
from azure.mgmt.resource import SubscriptionClient
import azure.mgmt.resourcegraph as arg
import json

import azure.functions as func
import azure.functions as func是特定于功能应用程序的类所必需的,我们还将添加import json,因为我们要返回json value
然后,我们可以像这样添加身份验证部分,并且当我们在原始代码中使用的credential变量时,否则其他需要从身份验证角度进行更改。
# Authenticate
credential = DefaultAzureCredential()
Python函数声明
在原始脚本中,代码围绕着这两个函数包裹,它们可以保持不变:
def resource_graph_query( query ):
    # Get your credentials from Azure CLI (development only!) and get your subscription list
    subs_client = SubscriptionClient(credential)
    subscriptions_dict = []

    for subscription in subs_client.subscriptions.list():
        subscriptions_dict.append(subscription.as_dict())

    subscription_ids_dict = []

    for subscription in subscriptions_dict:
        subscription_ids_dict.append(subscription.get('subscription_id'))

    # Create Azure Resource Graph client and set options
    resource_graph_client = arg.ResourceGraphClient(credential)
    resource_graph_query_options = arg.models.QueryRequestOptions(result_format="objectArray")

    # Create query
    resource_graph_query = arg.models.QueryRequest(subscriptions=subscription_ids_dict, query=query, options=resource_graph_query_options)

    # Run query
    resource_graph_query_results = resource_graph_client.resources(resource_graph_query)

    # Show Python object
    return resource_graph_query_results

def check_name_availability(resource_name, resource_type=None):

    if(resource_type):
        rg_query = f"Resources | where name =~ '{resource_name}' | where type =~ '{resource_type}'"
    else:
        rg_query = f"Resources | where name =~ '{resource_name}'"


    rg_results = resource_graph_query(rg_query)

    results_dict = []

    if(rg_results.data):
        availability = False
    else:
        availability = True

    results_dict = dict({
        'resource_name': resource_name,
        'available': availability
    })

    return results_dict
特定于功能应用的代码
必须修改以下代码以适合该功能应用程序。
我们基本上正在定义名称和路线:
app = func.FunctionApp()

@app.function_name(name="CheckNameAvailability")
@app.route(route="checkNameAvailability")
这将创建具有CheckNameAvailability名称和路由的函数应用程序,该路由定义了URL-在上述示例的情况下,这是https://{function-app-name}.azurewebsites.net/api/checknameavailability。
最后,我们需要包含代码的主函数。该函数接受两个参数,即resourceName和resourceType,它们添加到相应的变量r_name和r_type中。这些可以作为参数或JSON有效载荷传递。然后,我们确实检查仅resourceName或BothM resourceName和resourceType,或者没有填充它们并将相应结果返回给呼叫者。
def main(req: func.HttpRequest) -> func.HttpResponse:
    r_name = req.params.get('resourceName')
    r_type = req.params.get('resourceType')
    if not r_name:
        try:
            req_body = req.get_json()
        except ValueError:
            pass
        else:
            r_name = req_body.get('resourceName')

    if not r_type:
        try:
            req_body = req.get_json()
        except ValueError:
            pass
        else:
            r_type = req_body.get('resourceType')

    if r_name and r_type:
        result = check_name_availability(resource_name=r_name, resource_type=r_type)
        result_as_json = json.dumps(result)
        return func.HttpResponse(result_as_json)
    elif r_name:
        result = check_name_availability(resource_name=r_name)
        result_as_json = json.dumps(result)
        return func.HttpResponse(result_as_json)
    else:
        return func.HttpResponse(
            "This HTTP triggered function executed successfully. Pass a resourceName in the query string or in the request body for a proper response.",
            status_code=200
        )
在本地创建功能
用于在本地创建该函数,我们需要确保appropriate prerequisites are met [12]。
然后,我们可以跟随Azure Function documentation on creating a local function project [13]。
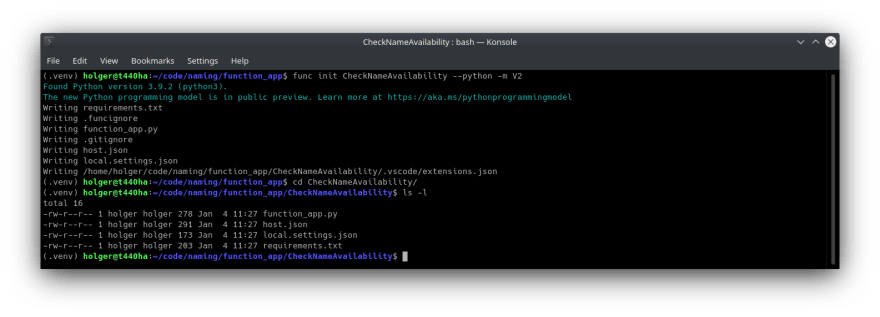
func init CheckNameAvailability --python -m V2
这将创建一个新文件夹以及函数应用所需的文件。
添加代码
文件:
我们可以将先前创建的代码添加到function_app.py文件中。此外,由于我们使用远程构建功能,因此需要填充requirements.txt文件。可以在here中找到样品,其中包括以下内容:
# Do not include azure-functions-worker in this file
# The Python Worker is managed by the Azure Functions platform
# Manually managing azure-functions-worker may cause unexpected issues

azure-functions
azure-common
azure-core
azure-identity
azure-mgmt-core
azure-mgmt-resource
azure-mgmt-resourcegraph
certifi
cffi
charset-normalizer
cryptography
idna
isodate
msal
msal-extensions
msrest
oauthlib
portalocker
pycparser
PyJWT
requests
requests-oauthlib
six
typing-extensions
urllib3
发布功能
对于将代码发布到我们的Azure函数应用程序中,我们可以运行以下命令以触发远程构建:
func azure functionapp publish {function-app-name}
一段时间后,我们应该看到通知Remote build succeeded!,并且Syncing triggers...成功地显示了新功能URL。如果这是暂停的,那么requirements.txt或代码的另一个问题中可能缺少依赖项。
测试功能
为了测试函数应用程序,我们需要知道功能密钥。我们可以通过门户网站查找它,也可以使用命令行:
func azure functionapp list-functions {function-app-name} --show-keys
也可以从命令行中使用curl来测试新创建的函数:
curl -X POST https://{function-app-name}.azurewebsites.net/api/checknameavailability \
     -H 'Content-Type: application/json' \
     -H 'x-functions-key: {FUNCTION-KEY}' \
     -d '{"resourceName": "{storage-account-name}", "resourceType": "Microsoft.Storage/storageAccounts"}' | jq
在上述示例的情况下,结果应为false,因为我为函数应用程序存储帐户使用了相同的名称。
{
  "resource_name": "{storage-account-name}",
  "available": false
}
如果我们尝试使用其他名称,它应该返回true:
curl -X POST https://{function-app-name}.azurewebsites.net/api/checknameavailability \
     -H 'Content-Type: application/json' \
     -H 'x-functions-key: {FUNCTION-KEY}' \
     -d '{"resourceName": "{unused-storage-account-name}", "resourceType": "Microsoft.Storage/storageAccounts"}' | jq
{
  "resource_name": "{unused-storage-account-name}",
  "available": true
}
打扫干净
成功学习和测试后,我们可以通过运行terraform destroy清理所有内容并删除先前创建的资源。


