Firebase Remote配置是应用程序开发人员的强大工具,可让他们轻松地修改应用程序的外观和行为,而无需用户下载更新。这可以节省时间和资源,并使得快速有效地对应用程序进行更改。
什么是功能标志?
功能标志是软件开发中的一个过程,可以管理功能的可用性。开发人员或任何有能力访问配置的人都可以启用或禁用远程使用此标志的功能而无需再次部署代码。
假设,我有一个NextJS应用程序,我想部署一个新按钮,我意识到该按钮无法正常工作。我可以禁用新按钮标志,而不是回到上一个按钮版本,而该站点将再次显示旧按钮。
在我们前往用例之前,您可以在下面查看非常简单的入门代码。
// Initialize Firebase
firebase.initializeApp({
  apiKey: "YOUR_API_KEY",
  authDomain: "YOUR_AUTH_DOMAIN",
  databaseURL: "YOUR_DATABASE_URL",
  projectId: "YOUR_PROJECT_ID",
  storageBucket: "YOUR_STORAGE_BUCKET",
  messagingSenderId: "YOUR_MESSAGING_SENDER_ID"
});

// Get a reference to the Remote Config service
const config = firebase.remoteConfig();

// Set default values
config.defaultConfig = ({
  "welcome_message": "Welcome to our app!"
});

// Fetch the config values
config.fetch()
  .then(() => {
    // Activate the fetched config
    return config.activate();
  })
  .then(() => {
    // Get the welcome message from the config
    const welcomeMessage = config.getValue("welcome_message").val();

    // Update the UI with the welcome message
    document.getElementById("welcome-message").textContent = welcomeMessage;
  })
  .catch((error) => {
    // There was an error fetching the config
    console.error(error);
  });
仅供参考,上面的代码是Firebase SDK的旧版本(版本8),我将告诉您最新的使用SDK版本9。
您看到config.activate();此处的目的是获取最新值。
如果您没有activate(),则您的getValue()只会返回一个空值。
为什么重要
激活方法用于将获取的参数值集应用于您的应用程序。当您调用获取时,远程配置API从服务器中检索最新的参数值,并在本地存储它们。在调用激活之前,这些值不会应用于您的应用。
好吧,现在我将向您展示我如何在NextJs中进行。
您需要准备的是准备壁炉应用程序,也准备好nextJ。我不会告诉您如何设置NextJ和Firebase,我希望您了解设置NextJs,包括kude3。
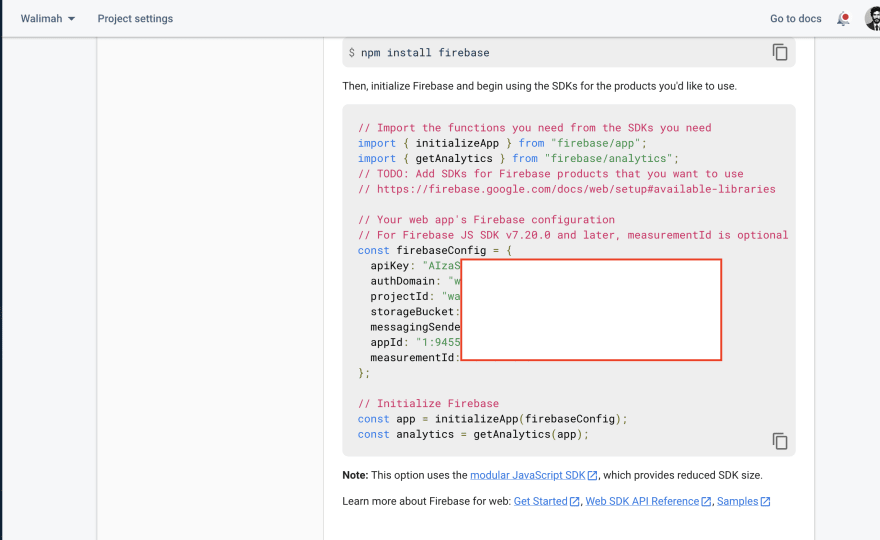
然后转到firebase项目设置以查看API和秘密键。
现在在nextjs root dir中创建.env,带有如下内容。
NEXT_PUBLIC_FIREBASE_APP_ID=
NEXT_PUBLIC_FIREBASE_API_KEY=
NEXT_PUBLIC_FIREBASE_MESSAGE_ID=
NEXT_PUBLIC_FIREBASE_PROJECT_ID=
NEXT_PUBLIC_FIREBASE_GA_ID=
使其整洁,在/src/config/index.ts中创建一个全局配置
export const firebaseApiKey = process.env.NEXT_PUBLIC_FIREBASE_API_KEY || '';
export const firebaseAppId = process.env.NEXT_PUBLIC_FIREBASE_APP_ID || '';
export const firebaseProjectId =
  process.env.NEXT_PUBLIC_FIREBASE_PROJECT_ID || '';
export const messagingSenderId =
  process.env.NEXT_PUBLIC_FIREBASE_MESSAGE_ID || '';
export const googleAnalyticId = process.env.NEXT_PUBLIC_FIREBASE_GA_ID || '';
下一步是创建Firebase Config。在/src/utils/firebaseConfig.ts中创建一个文件。
您可以遵循我的风格或也可以使用您的风格。
// Import the functions you need from the SDKs you need
import { initializeApp } from 'firebase/app';
import { getRemoteConfig } from 'firebase/remote-config';

import {
  firebaseApiKey,
  firebaseAppId,
  firebaseProjectId,
  messagingSenderId,
  googleAnalyticId,
} from '@/config';
// TODO: Add SDKs for Firebase products that you want to use
// https://firebase.google.com/docs/web/setup#available-libraries

// Your web app's Firebase configuration
const firebaseConfig = {
  apiKey: firebaseApiKey,
  authDomain: `${firebaseProjectId}.firebaseapp.com`,
  projectId: firebaseProjectId,
  storageBucket: `${firebaseProjectId}.appspot.com`,
  messagingSenderId,
  appId: firebaseAppId,
  measurementId: googleAnalyticId,
};

// Initialize Firebase
export const app = initializeApp(firebaseConfig);

let remoteConfigVar;
if (typeof window !== 'undefined') {
  remoteConfigVar = getRemoteConfig(app);
  remoteConfigVar.settings.minimumFetchIntervalMillis = 600000;
}
export const remoteConfig = remoteConfigVar;
我将突出显示这一行typeof window !== 'undefined'。由于我们的NextJS在服务器端运行,因此无法初始化远程配置,因此我们需要检查window是否不是undefined。
另外,我们有这个remoteConfigVar.settings.minimumFetchIntervalMillis = 600000;。默认情况下,Firebase将缓存配置12小时,因此在12小时之前不会应用任何更改,但是我们可以添加最小的提取间隔至10分钟。
然后在nextjs中,假设在index.ts页面中。
import { getValue, fetchAndActivate } from 'firebase/remote-config';
import { remoteConfig } from '@/utils/firebaseConfig';
然后
  const [showBtn, setShowBtn] = useState(false);

  const getConfigValue = () => {
    const firebaseRemoteConfig = remoteConfig;
    if (firebaseRemoteConfig) {
      fetchAndActivate(firebaseRemoteConfig).then(() => {
        setShowBtn(getValue(firebaseRemoteConfig, 'show_button').asBoolean());
    }
  };

  useEffect(() => {
    getConfigValue();
  }, []);
和JSX,
<div className="p-16 text-white">
  {showBtn ? (
    <Button type="primary">New Button</Button>
   ) : (
    <Button type="primary">Old Button</Button>
   )}
</div>
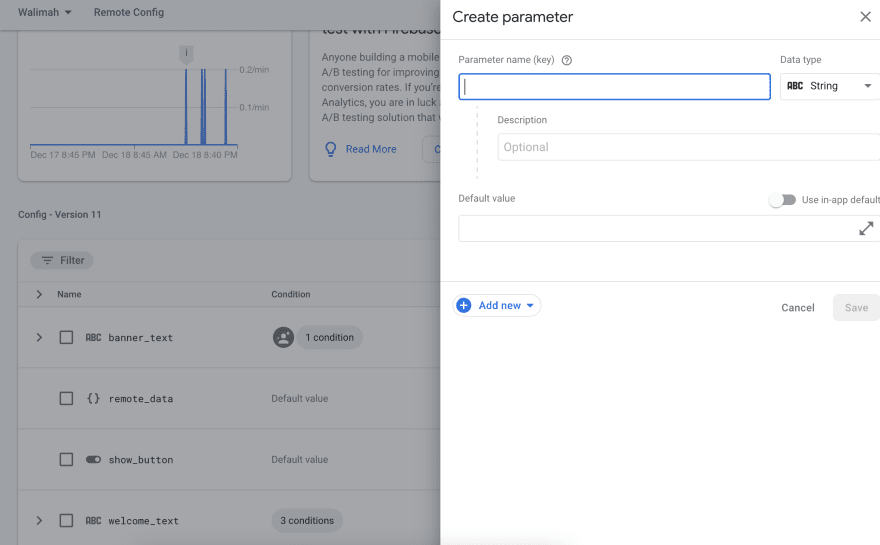
不要忘记将配置设置在firebase仪表板中。
接下来,我将尝试掩盖另一个firebase主题,请参阅ya!

