我建造的
帮助 - 一个简单的知识基础构建器。它可以帮助您为客户支持团队建立知识库。这是一个自托管解决方案,您可以在自己的基础架构上部署。它是使用next.js,supabase,mongodb和尾风CSS构建的。
类别提交
不再搜索:使用MongoDB Atlas和Atlas Search
构建具有全文搜索功能的应用程序应用链接
Demo HelpCenter for a E-commerce Store
屏幕截图
后端
Watch demo
前端
Watch demo
描述
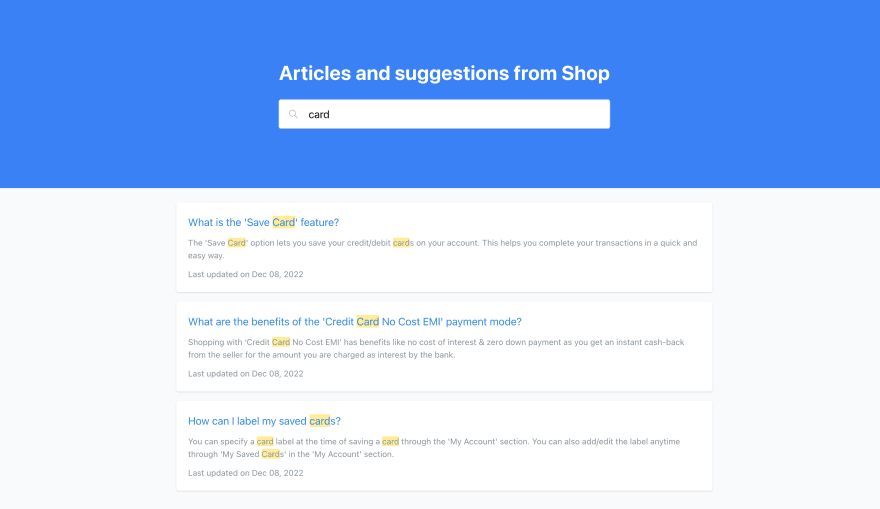
帮助是一个简单的知识基础构建器。它可以帮助您为客户支持团队建立知识库。您可以根据需要添加尽可能多的工作区。每个工作区都有自己的一套文章。您可以将文章分为收藏。您可以按标题,内容搜索文章。
这是应用程序的一些功能。
- 创建一个帐户
- 创建和管理工作区
- 创建和管理集合
- 创建和管理文章
- 自定义帮助中心的着陆页
- 按标题和内容搜索文章
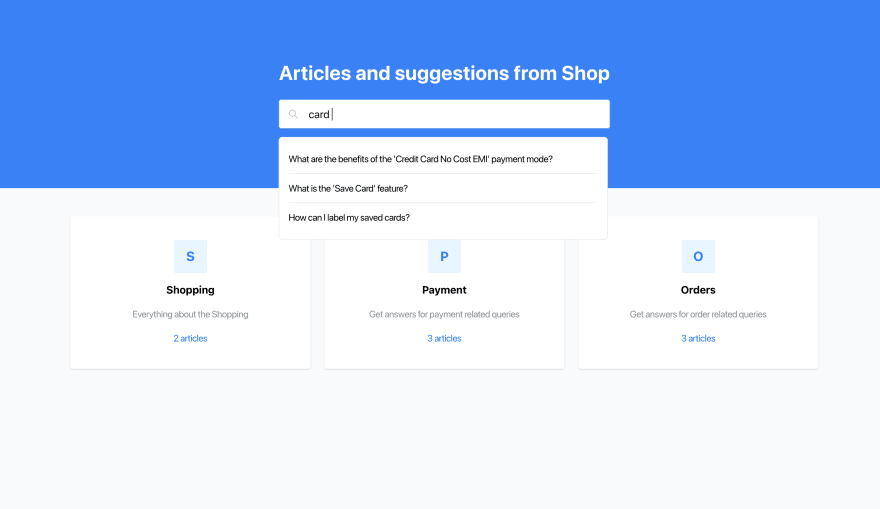
- 自动完成搜索标题
- 在文章内容中突出显示搜索词
- 允许用户分享文章的反馈
链接到源代码
允许许可证
我如何建造它
我使用next.js,supabase,mongodb和tailwind CSS构建了该应用程序。我使用mongodb地图集来存储和查询数据。
让我们看一下应用程序的重要部分。
搜索文章
我创建了 mongodb atlas搜索索引 searchArticles搜索文章。我将以下映射用于索引。
{
  "mappings": {
    "dynamic": false,
    "fields": {
      "contentText": {
        "type": "string"
      },
      "title": {
        "type": "string"
      },
      "workspaceId": {
        "type": "objectId"
      }
    }
  },
  "storedSource": {
    "include": ["workspaceId"]
  }
}
然后创建了地图集函数来搜索文章。这是一个简单的功能,将searchTerm和workspaceId作为输入并返回搜索结果。这是函数的代码。
exports = function ({ query, headers, body }, response) {
  const { searchTerm, workspaceId } = query;

  const docs = context.services
    .get("mongodb-atlas")
    .db("helpup")
    .collection("Article")
    .aggregate([
      {
        $search: {
          index: "searchArticles",
          compound: {
            must: [
              {
                text: {
                  query: searchTerm,
                  path: ["title", "contentText"],
                },
              },
            ],
            filter: [
              {
                equals: {
                  value: new BSON.ObjectId(workspaceId),
                  path: "workspaceId",
                },
              },
            ],
          },
        },
      },
      {
        $project: {
          _id: 0,
          title: 1,
          slug: 1,
          contentText: 1,
          updatedAt: 1,
        },
      },
    ]);

  return docs;
};
然后,我创建了一个 https端点 /searchArticles来调用上述ATLAS函数。我从Next.js getServerSideProps函数中调用此端点以获取搜索结果。这是调用端点的代码。
const url = new URL(`${process.env.NEXT_PUBLIC_ATLAS_APP_URL}/searchArticles`);

url.searchParams.set("searchTerm", searchTerm);
url.searchParams.set("workspaceId", workspaceId);

const response = await fetch(url, {
  method: "GET",
  headers: {
    "Content-Type": "application/json",
  },
});

const articles = await response.json();
自动完成搜索
我创建了另一个 mongodb atlas搜索索引 autocompleteArticles,以自动完成搜索标题。我将以下映射用于索引。
{
  "mappings": {
    "dynamic": false,
    "fields": {
      "title": {
        "type": "autocomplete"
      },
      "workspaceId": {
        "type": "objectId"
      }
    }
  },
  "storedSource": {
    "include": [
      "workspaceId"
    ]
  }
}
创建了一个新的 atlas函数以自动完成搜索标题。这是一个简单的功能,将searchTerm和workspaceId作为输入并返回搜索结果。
exports = function ({ query, headers, body }, response) {
  const { searchTerm, workspaceId } = query;

  const docs = context.services
    .get("mongodb-atlas")
    .db("helpup")
    .collection("Article")
    .aggregate([
      {
        $search: {
          index: "autocompleteArticles",
          compound: {
            must: [
              {
                autocomplete: {
                  query: searchTerm,
                  path: "title",
                },
              },
            ],
            filter: [
              {
                equals: {
                  value: new BSON.ObjectId(workspaceId),
                  path: "workspaceId",
                },
              },
            ],
          },
        },
      },
      {
        $project: {
          _id: 0,
          title: 1,
          slug: 1,
          contentText: 1,
          updatedAt: 1,
        },
      },
    ]);

  return docs;
};
我创建了另一个 https端点 /autocompleteArticles,以调用上述atlas函数。我从客户端打电话给此端点以获取自动完成搜索结果。


