随着事件在数字景观中的发展,我们可能已经看到了在社交媒体上共享的一些有趣,引人入胜且个性化的活动门票。这项创新令人着迷,并展示了网络开发中有多少优质的低成本服务和功能。
这篇文章将使用Cloudinary,Xata和Next.js讨论建筑音乐会门票。在本教程的末尾,我们将学习如何将图像存储在Cloudinary上并探索无服务器数据库XATA的丰富功能。
先决条件
需要以下知识:
- javascript和react.js的知识
- node.js及其软件包管理器NPM。我们运行命令
node -v&&npm -v以验证我们安装了它们或从here安装它们 - Signup用于免费的Cloudinary帐户
- A Xata account
- 理解Next.js将帮助我们快速遵循本教程
创建next.js应用程序
要创建next.js应用程序,我们转到终端或命令行。使用cd命令,我们导航到我们希望创建应用程序的目录。
cd <directory-name>
在目录中,我们使用命令创建一个新项目:
npx create-next-app

# or

yarn create next-app
完成后,我们将导航到该目录,并使用以下方式在http://localhost:3000上为该项目启动一个热填充的开发服务器
npm run dev
#or
yarn dev
安装云
Cloudinary提供了一个可靠的解决方案,可以在软件应用程序中存储,转换,优化和传递图像和视频。
安装 cloudinary-react 软件包,该软件包使用命令行揭示了各种媒体交付和转换功能。
npm i cloudinary-react lodash
lodash是云软件包的依赖性。
安装parwindcss
TailwindCSS是一个公用事业第一的CSS框架,其中包含类,可帮助我们样式的网页。
我们通过NPM安装tailwindcss及其同行依赖项,该npm生成tailwind.config.js和postcss.config.js。
npm install -D tailwindcss postcss autoprefixer
npx tailwindcss init -p
我们需要将路径添加到tailwind.config.js文件中的所有模板文件中。
//tailwind.config.js
module.exports = {
  content: [
    "./pages/**/*.{js,ts,jsx,tsx}",
    "./components/**/*.{js,ts,jsx,tsx}",
  ],
  theme: {
    extend: {},
  },
  plugins: [],
}
我们应该在我们的./styles/globals.css文件中添加tailwind层的@tailwind指令。
//globals.css
@tailwind base;
@tailwind components;
@tailwind utilities;
设置XATA数据库
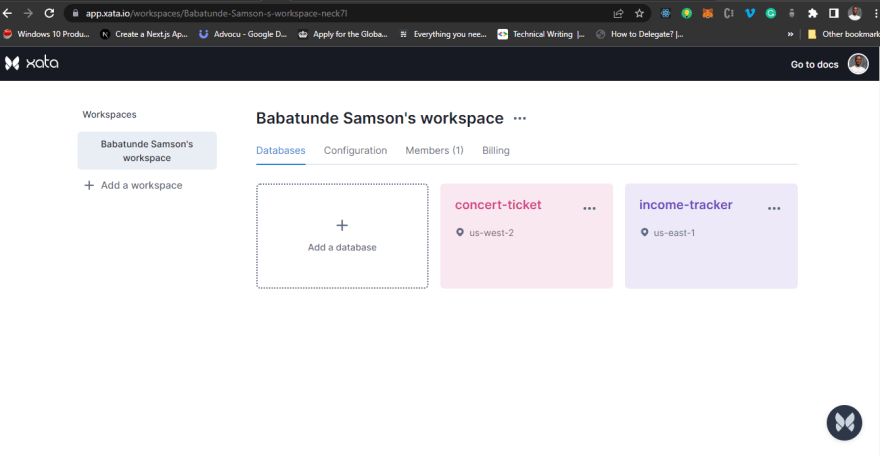
让我们在我们的XATA仪表板上创建一个新数据库,称为concert-ticket
单击创建的数据库,然后添加一个名为concert的表。接下来,将字符串类型的concert_name和artist列添加到表。
我们的数据库应该看起来像这样:
设置XATA实例
要设置XATA,我们需要在全球安装CLI:
npm install @xata.io/cli -g
然后,授权XATA登录我们:
xata auth login
接下来,我们从终端中的提示中选择Create a new API key in the browser。这打开了我们的浏览器,我们可以在其中输入任何名称。一旦成功,我们将获得一个显示页面,指示我们都设置了。
现在,让S cd进入较早创建的NextJS项目,并运行xata init以初始化我们的项目中的XATA;
cd <directory-name>
xata init
这是我们选择前面创建的数据库的名称的地方,然后选择Generate Javascript code with ES modules code并选择我们的输出源为src/xata.js,它将生成XATA Codegen。
图像上传到云
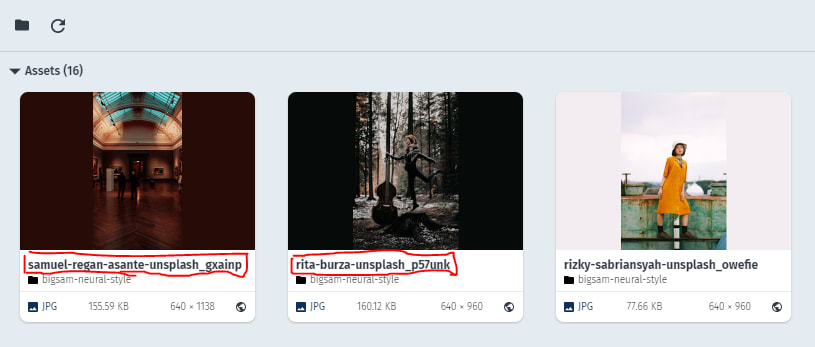
在我们的仪表板中,我们将可以通过单击“ Media Library”选项卡和上传按钮访问上传并保存在Cloudinary中的下载图像,如下所示。
接下来,我们需要将publicId复制为我们仪表板中保存的图像,这是生成文章横幅的必要条件。
设置图像集合
我们将在项目root目录中创建一个utils文件夹,我们需要在其中创建一个ticket.json文件以保留上传图像的数据。
这是ticket.json文件的JSON数据。
[
    {
        "id": 1,
        "publicId": "photo-1649894221695-45abb718a190_sgjhwd.jpg"
    },
    {
        "id": 2,
        "publicId": "photo-1649894222226-056a1a79d9fb_xlv73h.jpg"
    },
    {
        "id": 3,
        "publicId": "photo-1648800475313-2bb7fbec8701_ae60yw.jpg"
    },
    {
        "id": 4,
        "publicId": "photo-1647067867267-e01d98462f3c_ugtnwe.jpg"
    },
    {
        "id": 5,
        "publicId": "photo-1644241687200-eadaf7601290_xcz2kh.jpg"
    }
]
创建音乐会门票
通过我们的项目完全设置和配置,我们可以开始建立音乐会票。
首先,我们需要将index.js文件夹中的index.js文件修改为下面的要点:
https://gist.github.com/Tundesamson26/52ec30218b5291b020a0d99b0517aa4f
https://gist.github.com/Tundesamson26/52ec30218b5291b020a0d99b0517aa4f
从要点中的代码片段中,我们:
- 导入所需的依赖关系和图像收集
- 创建状态变量以管理选定的图像ID,形式数据并显示音乐会票
-
handleChange函数控制表单输入 - 对表单元素的标记,并使用
cloudinary-react有条件地渲染图像列表。图像列表还具有onClick功能,该功能设置了当前图像id以显示活动映像,表单对象和showCard属性
现在,应用程序应该看起来像这样:
接下来,我们在根目录中创建一个components文件夹,并使用以下片段创建一个Concert.js文件:
import { CloudinaryContext, Transformation, Image } from "cloudinary-react";

export const Concert = ({ message, name, publicId }) => {
  return (
    <div>
      <CloudinaryContext cloudName="beswift">
        <Image publicId={publicId} alt="image" width={1000} ref={ref}>
          <Transformation crop="fit" effect="blur:100" />
          <Transformation effect="brightness_hsb:-50" />
          <Transformation
            color="#FFFFFF"
            overlay={{
              background: "",
              fontFamily: "Neucha",
              fontSize: 150,
              fontWeight: "bold",
              text: message,
              textAlign: "center",
            }}
            width="1300"
            crop="fit"
          />
          <Transformation flags="layer_apply" />
          <Transformation
            color="#FFFFFF"
            overlay={{
              fontFamily: "Dancing Script",
              fontSize: 50,
              fontWeight: "bold",
              text: `Artist: ${name}`,
            }}
          />
          <Transformation
            flags="layer_apply"
            gravity="center"
            x="450"
            y="350"
          />
        </Image>
      </CloudinaryContext>

    </div>
  );
};
上面的摘要执行以下操作:
- 导入所需的依赖项
-
Concert组件接受message,name和publicIdprops - 配置
CloudinaryContext,Image和Transformation以渲染图像,消息和名称 - 我们还利用Cloudinary在图像上应用多个转换。我们添加了以下转换,裁剪,模糊,亮度并添加了文本,文本位置,文本属性和标志的叠加层,以更改文本的位置
然后,我们更新index.js以有条件地渲染Concert.js组件,如下所示:
//imports here
import { Concert } from '../components/Concert'; //add

export default function Home() {
  //states here

  const handleChange = (e) => {
    //handle change codes here
  };

  //add
  const handleSubmit = (e) => {
    e.preventDefault();
    if (imageId) {
      setShowCard(true);
    } else {
      setFormData({ ...formData, error: true });
    }
  };

  return (
    <div className='p-10'>
      {/* Head JSX comes here */}
      <main className=''>
        <h1 className='text-3xl'>Concert ticket</h1>
        <header className='flex border-b-2 mt-7 mb-7'>
          {/* Header contents JSX comes here */}
        </header>
        <form onSubmit={handleSubmit} className='lg:w-2/5'> {/* add handleSubmit */}
          {/* Form contents JSX comes here */}
        </form>

        {/* Conditionally render card Components */}
        {showCard && (
          <div className='mt-10'>
            <Concert
              message={formData.message}
              name={formData.name}
              publicId={formData.publicId}
            />
          </div>
        )}
      </main>
    </div>
  );
}
在上面的摘要中,我们:
- 导入
Concert组件 - 创建了一个
handleSubmit函数,该功能检查是否选择了图像,然后有条件地将Concert组件呈现必要的props
将数据存储在数据库中
让我们在api文件夹中创建一个新文件,并将其命名为add-concert.js。将下面的代码粘贴到文件中:
import { getXataClient } from "../../src/xata";
const handler = async (req, res) => {
  const xata = await getXataClient();
  const { concert_name, artist } =
    req.body;
  await xata.db.concert.create({
    concert_name,
    artist,
  });
  res.end();
};
export default handler;
我们将数据发送到API并将其保存到XATA数据库。
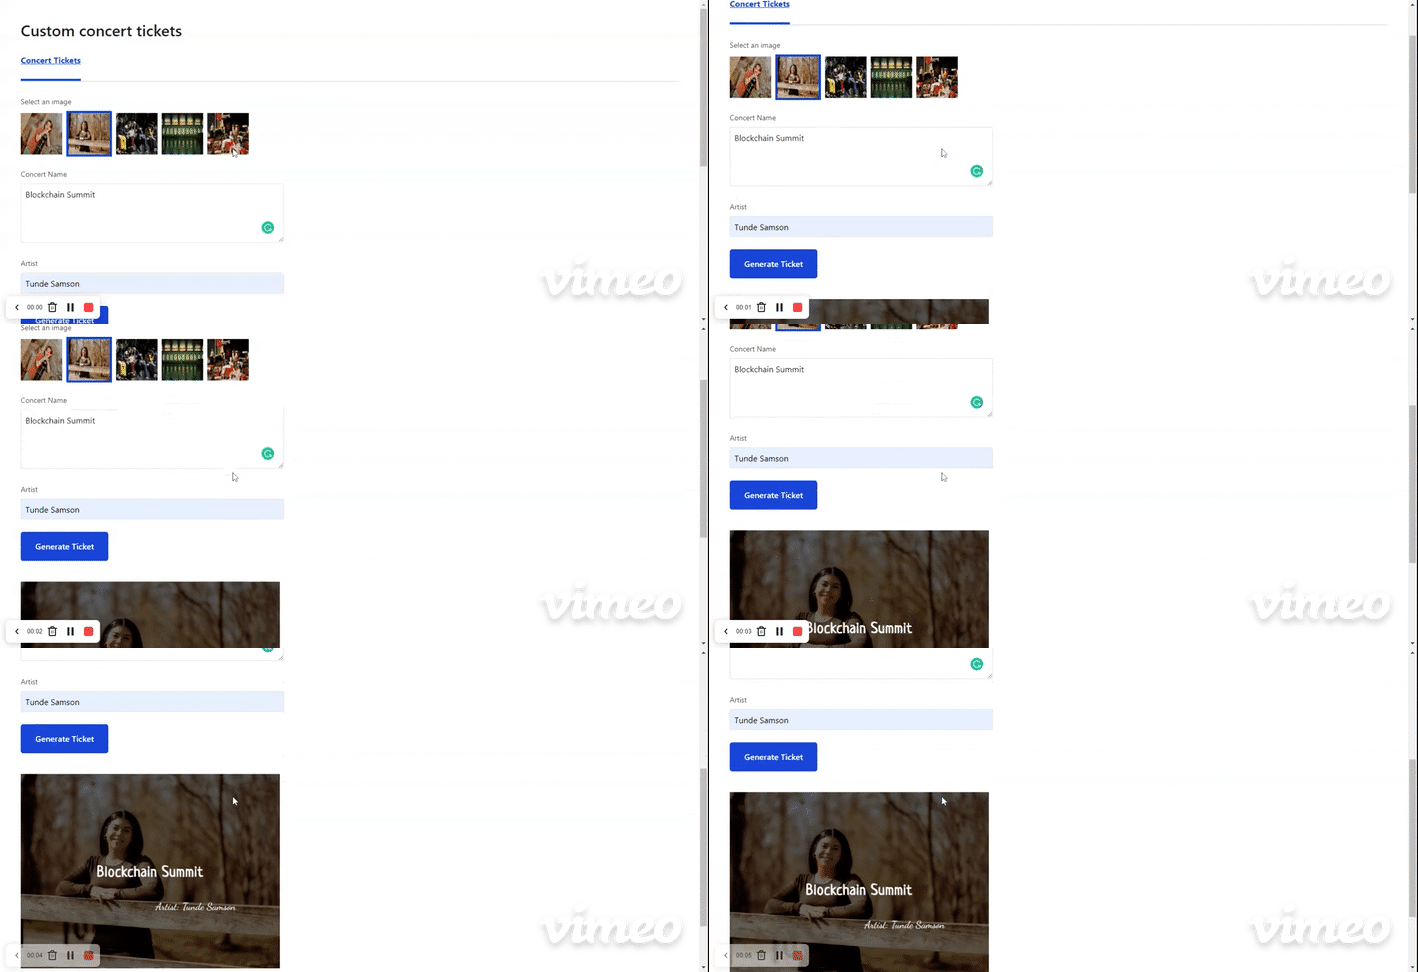
最后,我们通过启动开发服务器并创建不同的事件票来测试我们的应用程序。
我们可以右键单击以复制生成图像的URL。
结论
这篇文章讨论了使用Cloudinary的图像转换和保存数据在XATA数据库中构建音乐会票务生成器。探索将更多文本信息添加到图像和图像URL的副本函数。
资源
我们可能会发现这些资源有帮助:


