在上一个post中,我们能够构建一个简单的MVVM体系结构,将应用程序连接到Poké©API,并通过日志列出Kanto的Poké©Mon。但是,我们尚未在我们的《神奇宝贝》的屏幕上列出pokémon,更不用说显示怪物的图像了。因此,在这篇文章中,我们将重构,实现回收器视图,并使用线圈在屏幕上显示pokâmon。
纠正小错误
以前,我最终在API映射中遇到了错误,特别是在JSON结构中包含我们要从Pokam©Mon的图像中的图像。我像这样映射了:
"sprites": {
    "official-artwork": {
      "front-default": "https://raw.githubusercontent.com/PokeAPI/sprites/master/sprites/pokemon/other/official-artwork/4.png"
    }
}
应该是什么样的:
"sprites": {
    "other": {
        "official-artwork": {
            "front_default": "https://raw.githubusercontent.com/PokeAPI/sprites/master/sprites/pokemon/other/official-artwork/4.png"
        }
    }
}
要纠正这一点,我们需要进行一些简单的调整:首先,让我们创建Koud0类:
package br.com.pokedex.api

import com.google.gson.annotations.SerializedName

data class Other(
    @SerializedName("official-artwork") val officialArtwork: OfficialArtWork
)
apó³s,只需以这种方式修改Sprites类:
package br.com.pokedex.api

import com.google.gson.annotations.SerializedName

data class Sprites(
    @SerializedName("other") val other: Other
)
最后,将koud3的koud2 koud2映射到koud4:
package br.com.pokedex.api

import com.google.gson.annotations.SerializedName

data class OfficialArtWork(
    @SerializedName("front_default") val frontDefault: String? = null
)
准备就绪:现在我们的API映射是正确的!
重构代码
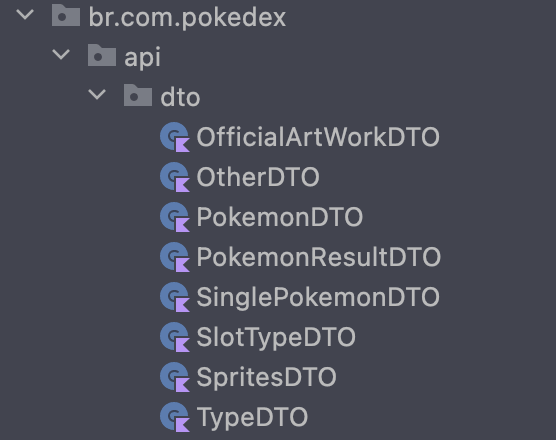
上一篇文章的另一个错误是在映射API时混合模型和DTO类的概念以及DTO(数据传输)类。类是一种软件模式,以便在系统层之间传输信息。例如,它可以在非常特定的状态下接收数据,而无需与应用程序的下层接收。在我们的情况下,他正是序列化JSON作为Pokage的答案。因此,让我们重命名上课模型的所有之前的课程,然后将它们放入Koude SpecyPace Package5:
:现在我们已经有了DTO课程,让我们真正地完成模型课程,它是DTO存储的数据的受体。首先,我们的课程将代表pokâ©mon,koud6:
package br.com.pokedex.model

data class SinglePokemon(
    val name: String,
    val id: Int,
    val imageUrl: String,
    val types: List<Type>
)
现在,让我们开发班级来表示pokémon的类型,koud7:
class
package br.com.pokedex.model

data class Type (
    val name: String
)
非常简单,不是吗?这两个模型类包含目前我们将需要的所有poké©mon数据。现在,让我们创建功能以映射名为Koud8的文件中的模型类。第一个是将SlotTypeDTO映射为koud7的函数:
package br.com.pokedex.data.mapper

import br.com.pokedex.api.dto.SlotTypeDTO
import br.com.pokedex.model.Type
import br.com.pokedex.util.emptyString

fun SlotTypeDTO.toModel() = Type(
    name = typeDTO.name ?: emptyString()
)
请注意,我们使用一个名为koud11的函数,它仅返回一个空字符串,如您的名字所说,我们这样做是为了使我们的代码更加惯用,在此处,您可以在一个名为koud12:
的文件中进行。
package br.com.pokedex.util

fun emptyString() = ""
现在,让我们制作一个函数来映射koud7列表的koud9列表:
package br.com.pokedex.data.mapper

import br.com.pokedex.api.dto.SlotTypeDTO
import br.com.pokedex.model.Type
import br.com.pokedex.util.emptyString

fun SlotTypeDTO.toModel() = Type(
    name = typeDTO.name ?: emptyString()
)

fun List<SlotTypeDTO>.toModel(): List<Type> {
    val types = mutableListOf<Type>()
    types.add(this.first().toModel())
    this.first().let { firstType ->
        this.last().let { secondType ->
            if(secondType != firstType) {
                types.add(secondType.toModel())
            } else {
                types.add(Type(emptyString()))
            }
        }
    }
    return types.toList()
}
这有点复杂,但是我们在这里做的是创建一个MutableList Type并添加了第一种pokémon,然后我们分析它是否具有第二种类型元素与第一个不同,这意味着有第二种类型,因此我们将其添加到列表中,如果相同,则有第二种类型,因此我们添加一个空字符串。最后,我们以List<Type>返回列表。
现在只将SinglePokemonDTO映射到koud6:
package br.com.pokedex.data.mapper

import br.com.pokedex.api.dto.SinglePokemonDTO
import br.com.pokedex.api.dto.SlotTypeDTO
import br.com.pokedex.model.SinglePokemon
import br.com.pokedex.model.Type
import br.com.pokedex.util.emptyString
import br.com.pokedex.util.zeroNumber

fun SlotTypeDTO.toModel() = Type(
    name = typeDTO.name ?: emptyString()
)

fun List<SlotTypeDTO>.toModel(): List<Type> {
    val types = mutableListOf<Type>()
    types.add(this.first().toModel())
    this.first().let { firstType ->
        this.last().let { secondType ->
            if(secondType != firstType) {
                types.add(secondType.toModel())
            } else {
                types.add(Type(emptyString()))
            }
        }
    }
    return types.toList()
}

fun SinglePokemonDTO.toModel() = SinglePokemon(
    name = name ?: emptyString(),
    id = id ?: zeroNumber(),
    imageUrl = sprites.other.officialArtworkDTO.frontDefault ?: emptyString(),
    types = types.toModel()
)
请注意,我们还使用zeroNumber()函数使我们的方式更加合法。这是她在IntExt文件中:
package br.com.pokedex.util

fun zeroNumber() = 0
现在,我们必须在课程中替换各自模型的这些课程成员,并特别注意以下内容:
package br.com.pokedex.data.repository

import br.com.pokedex.api.PokemonApi
import br.com.pokedex.data.mapper.toModel
import retrofit2.Retrofit
import retrofit2.converter.gson.GsonConverterFactory

class PokemonRepositoryImpl {

    private val api: PokemonApi = Retrofit.Builder()
        .baseUrl("https://pokeapi.co/api/v2/")
        .addConverterFactory(GsonConverterFactory.create())
        .build()
        .create(PokemonApi::class.java)

    suspend fun getSinglePokemon(id: Int) = api.getSinglePokemon(id).toModel()
}
equinã3s我们将使用它来为神奇宝贝的fuamçã£o:emm我们处于简历或类型的返回this23 for this6中。 ch
s最后,但同样重要的是,让我们重命名为koud26的koud25接口,以便清楚地表明,它的接口包含so -calledpokéapi:
package br.com.pokedex.api

import br.com.pokedex.api.dto.SinglePokemonDTO
import retrofit2.http.GET
import retrofit2.http.Path

interface PokemonApi {

    @GET("pokemon/{id}/")
    suspend fun getSinglePokemon(
        @Path("id") id: Int?
    ): SinglePokemonDTO

}
准备好:我们重做了我们的焦油!现在,它比以前更好的可读性和数据组成。
Construindo的回收器视图
对于我们的pokâ©dex确实要成为魔鬼©dex,我们需要将口袋怪物显示为列表,为此,有几种Android解决方案,例如回收器视图。让我们将其用于显示大型数据动力学的效率。
使用回收器视图,我们提供数据并定义每个项目的Aparencia,此后,顾名思义,此数据被回收:当项目滚出屏幕时,回收器会重新循环使用其对出现的新项目的视图屏幕上。这大大提高了性能,提高了应用程序的响应能力并降低了能耗。更多信息在这里:developer.android。
实施回收器视图不是一个琐碎的任务:(1)首先决定是列表还是网格,(2)在创建列表中每个元素的外观和行为之后,(3)扩展从ViewHolder类负责为列表中的项目提供所有功能,最后(4)定义将您的数据关联以查看ViewHolder的Adapter。 ph,很多,不是吗?所以让我们尽快开始!
为了谈论对话,让我们暂时将我们的pokéDex作为列表,并定义如何将这些物品拒之门外。因此,我们创建了pokemon_card.xml布局,如下所示:
<?xml version="1.0" encoding="utf-8"?>
<androidx.constraintlayout.widget.ConstraintLayout xmlns:android="http://schemas.android.com/apk/res/android"
    xmlns:tools="http://schemas.android.com/tools"
    android:layout_width="wrap_content"
    android:layout_height="wrap_content"
    xmlns:app="http://schemas.android.com/apk/res-auto"
    android:padding="32dp">

    <ImageView
        android:id="@+id/pokemonImage"
        android:layout_width="wrap_content"
        android:layout_height="wrap_content"
        app:layout_constraintStart_toStartOf="parent"
        app:layout_constraintEnd_toEndOf="parent"
        app:layout_constraintTop_toTopOf="parent"
        android:importantForAccessibility="no"
        tools:src="@drawable/bulbasaur"/>

    <TextView
        android:id="@+id/pokemonName"
        android:layout_width="wrap_content"
        android:layout_height="wrap_content"
        app:layout_constraintStart_toStartOf="parent"
        app:layout_constraintEnd_toEndOf="parent"
        app:layout_constraintTop_toBottomOf="@id/pokemonImage"
        tools:text="Bulbasaur" />

    <TextView
        android:id="@+id/pokemonId"
        android:layout_width="wrap_content"
        android:layout_height="wrap_content"
        app:layout_constraintStart_toStartOf="@id/pokemonName"
        app:layout_constraintEnd_toEndOf="@id/pokemonName"
        app:layout_constraintTop_toBottomOf="@id/pokemonName"
        tools:text="#001" />

    <TextView
        android:id="@+id/firstPokemonType"
        android:layout_width="wrap_content"
        android:layout_height="wrap_content"
        app:layout_constraintStart_toStartOf="@id/pokemonName"
        app:layout_constraintEnd_toEndOf="@id/pokemonName"
        app:layout_constraintTop_toBottomOf="@id/pokemonId"
        tools:text="Grass" />

    <TextView
        android:id="@+id/secondPokemonType"
        android:layout_width="wrap_content"
        android:layout_height="wrap_content"
        android:visibility="gone"
        app:layout_constraintStart_toStartOf="@id/firstPokemonType"
        app:layout_constraintEnd_toEndOf="@id/firstPokemonType"
        app:layout_constraintTop_toBottomOf="@id/firstPokemonType"
        tools:text="Poison" />

</androidx.constraintlayout.widget.ConstraintLayout>
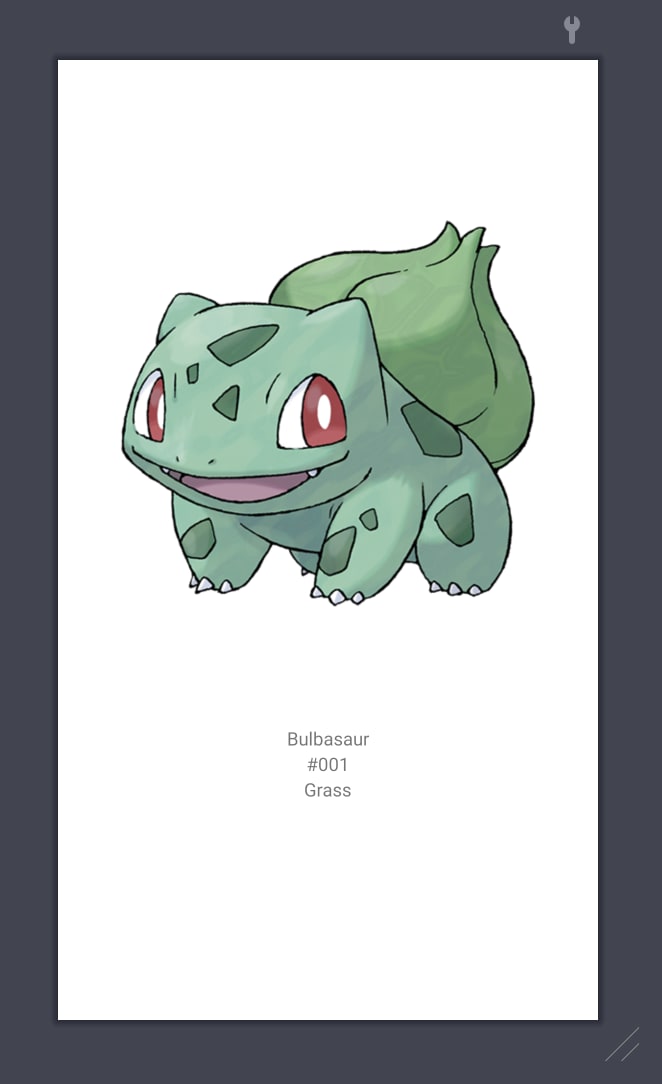
一个非常简单的布局:我们拥有pokémon的图像,其名称,ID和类型。请注意,第二种类型是gone作为模式,也就是说,它不在屏幕上,我们会这样做,因为并非每种pokémonttant tum testockâmokém。使用此布局,我们将获得此结果:
接下来,我们将在我们的koud34中添加koud33 koud32,并通知您您的koud35是我们刚刚构建的布局:
<?xml version="1.0" encoding="utf-8"?>
<androidx.constraintlayout.widget.ConstraintLayout xmlns:android="http://schemas.android.com/apk/res/android"
    android:layout_width="match_parent"
    android:layout_height="match_parent"
    xmlns:tools="http://schemas.android.com/tools"
    xmlns:app="http://schemas.android.com/apk/res-auto">

    <androidx.recyclerview.widget.RecyclerView
        android:id="@+id/pokedexRecyclerView"
        android:layout_width="wrap_content"
        android:layout_height="wrap_content"
        app:layout_constraintStart_toStartOf="parent"
        app:layout_constraintEnd_toEndOf="parent"
        app:layout_constraintTop_toTopOf="parent"
        tools:listitem="@layout/pokemon_card" />

</androidx.constraintlayout.widget.ConstraintLayout>
完成了,现在让我们创建我们的Adapter,因此扩展和自定义ViewHolder,让我们称之为此类PokedexAdapter:
package br.com.pokedex.presentation

import android.content.Context
import android.view.LayoutInflater
import android.view.ViewGroup
import android.widget.ImageView
import androidx.recyclerview.widget.RecyclerView
import br.com.pokedex.databinding.PokemonCardBinding
import br.com.pokedex.model.SinglePokemon
import br.com.pokedex.util.showIf

class PokedexAdapter(
    private val context: Context,
    private val pokemon: List<SinglePokemon>
) : RecyclerView.Adapter<PokedexAdapter.PokemonViewHolder>() {

    inner class PokemonViewHolder(binding: PokemonCardBinding) :
        RecyclerView.ViewHolder(binding.root) {
        private val name = binding.pokemonName
        private val id = binding.pokemonId
        private val firstType = binding.firstPokemonType
        private val secondType = binding.secondPokemonType

        fun bind(singlePokemon: SinglePokemon) {
            name.text = singlePokemon.name
            id.text = singlePokemon.id.toString()
            firstType.text = singlePokemon.types.first().name
            secondType.text = singlePokemon.types.last().name
            secondType.apply {
                showIf(text.isNotEmpty())
            }
        }
    }

    override fun onCreateViewHolder(
            parent: ViewGroup,
            viewType: Int
        ): PokemonViewHolder {
        return PokemonViewHolder(
            PokemonCardBinding.inflate(
                LayoutInflater.from(context),
                parent,
                false
            )
        )
    }

    override fun onBindViewHolder(
            holder: PokemonViewHolder,
            position: Int
        ) {
        holder.bind(pokemon[position])
    }

    override fun getItemCount() = pokemon.size
}
好吧,这次的路很大,让我们去零件。首先,我们的课程从RecyclerView.Adapter延伸,并使用PokedexViewHolder来制作数据的绑定(韧带)。该类有两个属性:一个context,将用于夸大布局,以及一个poké©mon List,我们的pokédex。
bind(),该bind()精确地将来自pokémon列表的数据与布局视图连接起来。请注意,在其中,我们使用称为Koud43的函数,此函数可根据条件制作可见的koude,在这种情况下,如果该容器不是空字符串。以下是koud45文件中包含的方式:package br.com.pokedex.util
import android.widget.TextView
fun TextView.showIf(condition: Boolean) {
if(condition) {
visibility = TextView.VISIBLE
}
}
请注意,我们有成绩单和压倒性:Koud46,Koud47和getItemCount(),这些妈妈是Recyclerview的引擎。以下是根据Android开发人员的官方网站的功能:
-
onCreateViewHolder():RecyclerView在需要创建新的ViewHolder时,将这个母亲称为©。母亲©Toda创建并初始化ViewHolder和Koud53相关的Koud53,但 no 填充可视化的控制。ViewHolderainda尚未链接到特定数据。 -
onBindViewHolder():RecyclerView称此母亲©所有人将ViewHolder与数据相关联。母亲寻求适当的数据并使用此数据来填写查看器的布局。例如,如果RecyclerView显示名称列表,则整个名称列表可能会在列表中找到适当的名称并填写Koudget Koudget View Fixer。在我们的情况下,填充的数据是特定的宠物。 -
getItemCount():RecyClerview打电话给此母亲以查看数据集的大小。例如,在地址列表应用程序中,它可能是地址总数。 RecyClerview使用此功能来确定何时没有更多的项目可以显示。
phe,我们终于完成了适配器,现在让我们对活动进行回复。为此,我们只是定义了您刚刚构建的经理布局和适配器。现在,管理器布局将为Koud61,因为我们将显示一个列表。 koudde62函数中包含的配置recyclerview的方式:
package br.com.pokedex.presentation

import android.os.Bundle
import androidx.appcompat.app.AppCompatActivity
import androidx.lifecycle.ViewModelProvider
import androidx.recyclerview.widget.LinearLayoutManager
import br.com.pokedex.databinding.ActivityPokedexBinding
import br.com.pokedex.model.SinglePokemon

class PokedexActivity: AppCompatActivity() {

    private val binding by lazy {
        ActivityPokedexBinding.inflate(layoutInflater)
    }

    private lateinit var viewModel: PokedexViewModel

    override fun onCreate(savedInstanceState: Bundle?) {
        super.onCreate(savedInstanceState)
        setContentView(binding.root)

        viewModel = ViewModelProvider(this)[PokedexViewModel::class.java]

        viewModel.getPokemon()

        viewModel.pokemon.observe(this@PokedexActivity) { pokedex ->
            setUpPokedexRecyclerView(pokedex)
        }
    }

    private fun setUpPokedexRecyclerView(pokedex: List<SinglePokemon>?) {
        pokedex?.let { pokemonList ->
            binding.pokedexRecyclerView.apply {
                layoutManager = LinearLayoutManager(context)
                adapter = PokedexAdapter(context, pokemonList)
            }
        }
    }

}
与此同时,我们几乎已经完成了今天的工作,我们只需要用线圈展示怪物的图像。
什么是线圈?
线圈是由Kotlin Coroutines构建的图像加载库。它是粗糙的,光线很轻(与毕加索和格莱德相比,大约有2000位母亲到APK,使用较小),使用和现代(线圈是在Kotlin制造的,并将现代图书馆用作Coroutines作为Coroutines,Okhttp,Okio和Androidx Lifecycles。<<<<<<<<<<<<<<<<<<<<<<< /p>
这就是为什么我们会使用它。
firiosidade:coilâoacrânimode co </strong>常规 i mage l l oader
展示猫头座
innio我们需要将线圈作为依赖我们的gradle文件的依赖:
dependencies {
    ...

    // Coil
    implementation("io.coil-kt:coil:2.2.2")

    ...
}
apons同步我们的gradele文件,我们可以访问gradele函数。放心,携带pokâmon的图像是当今最狂热的部分,分析以下方式:
package br.com.pokedex.presentation

import android.content.Context
import android.view.LayoutInflater
import android.view.ViewGroup
import android.widget.ImageView
import androidx.recyclerview.widget.RecyclerView
import br.com.pokedex.databinding.PokemonCardBinding
import br.com.pokedex.model.SinglePokemon
import br.com.pokedex.util.showIf
import coil.load

class PokedexAdapter(
    private val context: Context,
    private val pokemon: List<SinglePokemon>
) : RecyclerView.Adapter<PokedexAdapter.PokemonViewHolder>() {

    inner class PokemonViewHolder(binding: PokemonCardBinding) :
        RecyclerView.ViewHolder(binding.root) {
        private val image = binding.pokemonImage
        private val name = binding.pokemonName
        private val id = binding.pokemonId
        private val firstType = binding.firstPokemonType
        private val secondType = binding.secondPokemonType

        fun bind(singlePokemon: SinglePokemon) {
            loadPokemonImage(image, singlePokemon.imageUrl)
            name.text = singlePokemon.name
            id.text = singlePokemon.id.toString()
            firstType.text = singlePokemon.types.first().name
            secondType.text = singlePokemon.types.last().name
            secondType.apply {
                showIf(text.isNotEmpty())
            }
        }

        private fun loadPokemonImage(image: ImageView, imageUrl: String) {
            image.load(imageUrl)
        }
    }

    override fun onCreateViewHolder(parent: ViewGroup, viewType: Int): PokemonViewHolder {
        return PokemonViewHolder(
            PokemonCardBinding.inflate(
                LayoutInflater.from(context),
                parent,
                false
            )
        )
    }

    override fun onBindViewHolder(holder: PokemonViewHolder, position: Int) {
        holder.bind(pokemon[position])
    }

    override fun getItemCount() = pokemon.size
}
您能注意到发生了什么变化吗?我们只需要使用coil load()来携带我们的pokâ©mono的每图像,然后将其用于函数koud64ð±
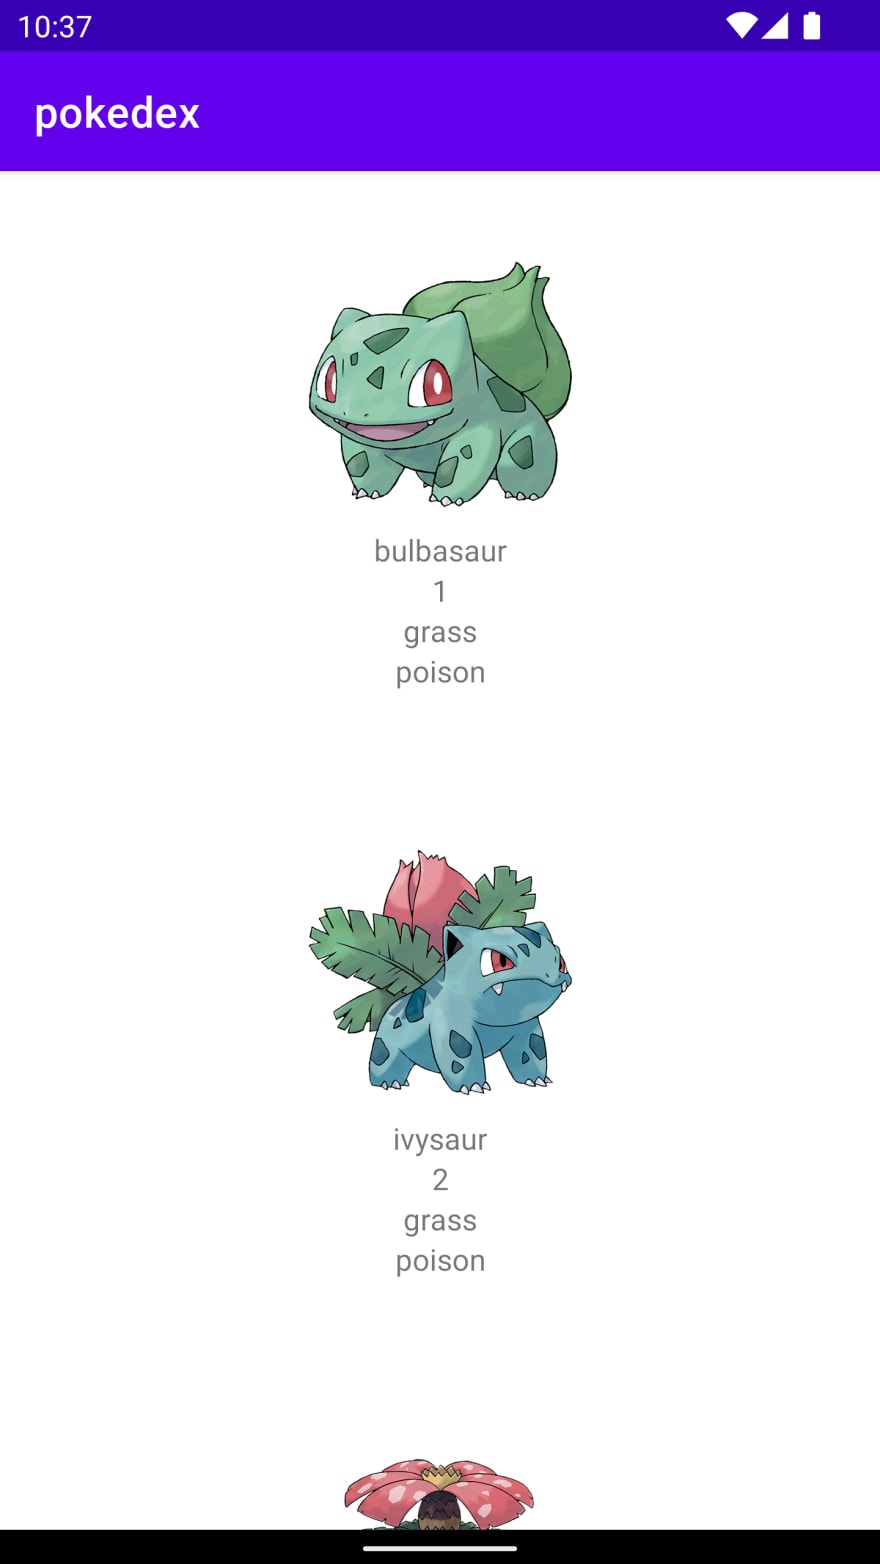
就是这样!只需运行应用即可查看结果:
cormrãvelNã?我们终于有了一个微不足道的恶毒,parabâ©ns!
帖子
我们的pokédex虽然被观看,但仍然非常丑陋和缓慢,花了大约20秒钟的时间,用于加载的所有口袋怪物的图像。我们将使您的性能提高并使其更加美丽。 github的存储库链接:repo。
感谢您的关注和下一个!


