模板引擎: -
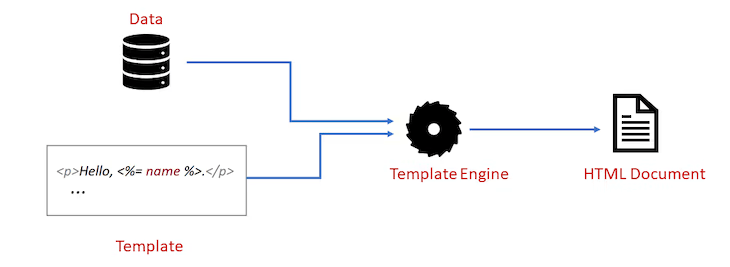
a 模板引擎使您可以在应用程序中使用静态模板文件。在运行时,模板引擎将模板文件中的变量替换为实际值,并将模板转换为发送给客户端的HTML文件。这种方法使设计HTML页面更容易。
Node.js都有许多模板引擎。每个模板引擎都使用不同的语言来定义HTML模板并将数据注入其中。
node.js中模板引擎的优点
提高了开发人员的生产率。
提高可读性和可维护性。
更快的性能。
多个页面的单个模板。
The following is a list of important (but not limited) template engines for Node.js
什么是EJS?
ejs是与节点JS一起使用的模板发动机之一,用于生成具有普通JavaScript的HTML标记。 EJS代表嵌入式JavaScript模板。它可以在客户端和服务器端都使用。
ejs文件用 .ejs 文件扩展名保存。
创建节点应用程序和安装依赖项
开放终端和运行命令
mkdir ejsdemo
cd ejsdemo
初始化npm package.json文件
npm init -y
package.json文件代码
{
  "name": "ejsdemo",
  "version": "1.0.0",
  "description": "",
  "main": "index.js",
  "scripts": {
    "test": "echo \"Error: no test specified\" && exit 1"
  },
  "keywords": [],
  "author": "ejs",
  "license": "ISC"
}
安装依赖性
npm i express
npm i ejs
现在,在此之后创建一个app.js文件并编写此代码。
const express = require('express');
const ejs = require('ejs');

const app = express();
const PORT = 8000;


app.get("/", (req, res) => {
    res.send("<h1> Hello World </h1>");
});

app.listen(PORT, () => {
    console.log(`Server is Listening at ${PORT} Port.`);
})
现在运行服务器;在termianl中写下此命令。
node app.js
代码的输出照片:
现在,要确认我们的EJS模板引擎,我们需要在app.js文件中编写此行。
// Set Template Engine
app.set('view engine', 'ejs')
app.set('视图引擎','ejs')是自称。我们将 EJS 设置为Express App View引擎。
现在,我们创建了一个名为“视图”的另一个文件夹,在其中创建一个index.ejs文件。
默认情况下,Express在解析模板文件时会查看视图文件夹的内部,这就是为什么我们必须创建一个视图文件夹。
现在; index.ejs 代码
<!DOCTYPE html>
<html lang="en">
<head>
    <meta charset="UTF-8">
    <meta http-equiv="X-UA-Compatible" content="IE=edge">
    <meta name="viewport" content="width=device-width, initial-scale=1.0">
    <title>Document</title>
</head>
<body>
        <h1> Ejs is a Template Engine </h1>
</body>
</html>
更新 app.js 文件:
const express = require('express');
const ejs = require('ejs');

const app = express();
const PORT = 8000;

// Set Template Engine
app.set('view engine', 'ejs')

app.get("/", (req, res) => {
    res.render("index");
});

app.listen(PORT, () => {
    console.log(`Server is Listening at ${PORT} Port.`);
})
1.将数据传递给渲染: -
更新 app.js 喜欢:
const express = require('express');
const ejs = require('ejs');

const app = express();
const PORT = 8000;

// Set Template Engine
app.set('view engine', 'ejs')

app.get("/", (req, res) => {
    res.render("index", {
        'firstName': 'Rohan',
        'lastName': 'Patel'
    });
});

app.listen(PORT, () => {
    console.log(`Server is Listening at ${PORT} Port.`);
})
更新 index.ejs 像这样:
<!DOCTYPE html>
<html lang="en">
<head>
    <meta charset="UTF-8">
    <meta http-equiv="X-UA-Compatible" content="IE=edge">
    <meta name="viewport" content="width=device-width, initial-scale=1.0">
    <title>Document</title>
</head>
<body>
    <h1> Ejs is a Template Engine </h1>
    <h1 style="color: purple;"> Hi <%= firstName %> - <%= lastName %> </h1>
</body>
</html>
运行节点app.js,您应该得到:
2.如果EJS中的其他条件语法:
在app.js文件中更新了此代码
app.get("/", (req, res) => {
    let login = true;
    res.render("index", {
        login: login
    })
});
index.ejs文件中更新代码
 <!-- if else Statement  -->
  <% if (login) { %>
  <h2> Welocome User </h2>
  <% } else { %>
  <h2> Please Login </h2>
  <% } %>
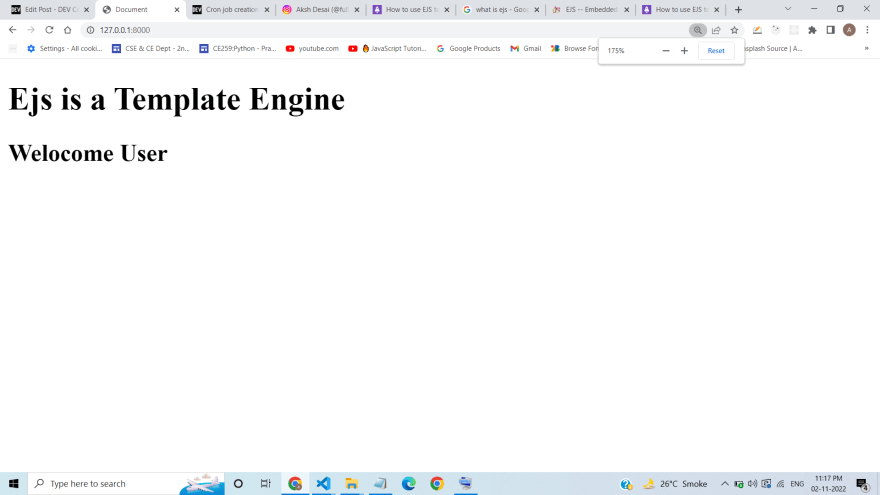
输出您应该获得此
3. EJS中的循环
app.js文件代码
app.get("/", (req, res) => {
    let student = {
        "20CE001" : "BHARGAV",
        "20CE015" : "AYUSH",
        "20CE016" : "KRUTIK",
        "20CE018" : "BHARGAVI",
        "20CE020" : "AKSH",
    };
    res.render("index", {
        stu: student
    })
});
index.ejs文件代码
<!-- for in loop  -->
    <% for (const key in stu) { %>
        <%= key %> - <%= stu[key] %>
        <br>
        <% } %>
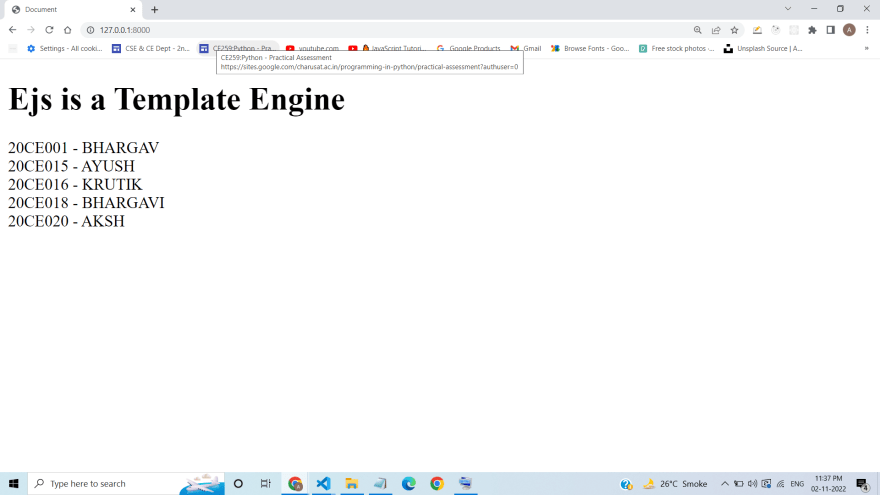
输出图像
4. EJS部分
网站的某些部分在不同页面(例如标题,页脚和侧边栏)中保持不变。 EJ为我们提供了允许我们重复使用视图的部分。
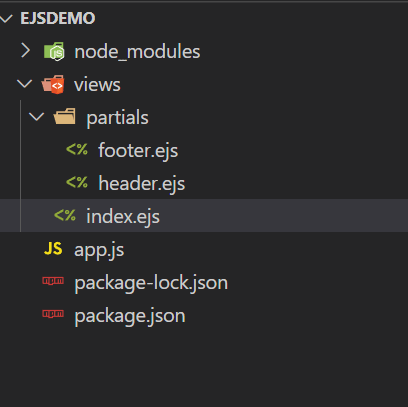
现在,我们创建了一个名为Partials的视图中的另一个文件夹;在其中我们创建两个称为header.ejs and footer.ejs的文件。
文件夹结构图像:
header.ejs文件代码
<!DOCTYPE html>
<html lang="en">

<head>
  <meta charset="UTF-8">
  <meta http-equiv="X-UA-Compatible" content="IE=edge">
  <meta name="viewport" content="width=device-width, initial-scale=1.0">
  <title>Document</title>
</head>

<body>
footer.ejs文件代码
</body>

</html>
index.ejs文件代码
<%- include("partials/header") %>
<h1> Ejs is a Template Engine </h1>

<!-- for in loop  -->
<% for (const key in stu) { %>
<%= key %> - <%= stu[key] %>
<br>
<% } %>

<%- include("partials/footer") %>
输出图像
结论
在本文中,我们审查了模板引擎,并介绍了JavaScript的EJS以及如何使用它。我们已经看到了如何与部分重复使用代码以及如何将数据传递给它们。
可用的完整源代码:Github Link


