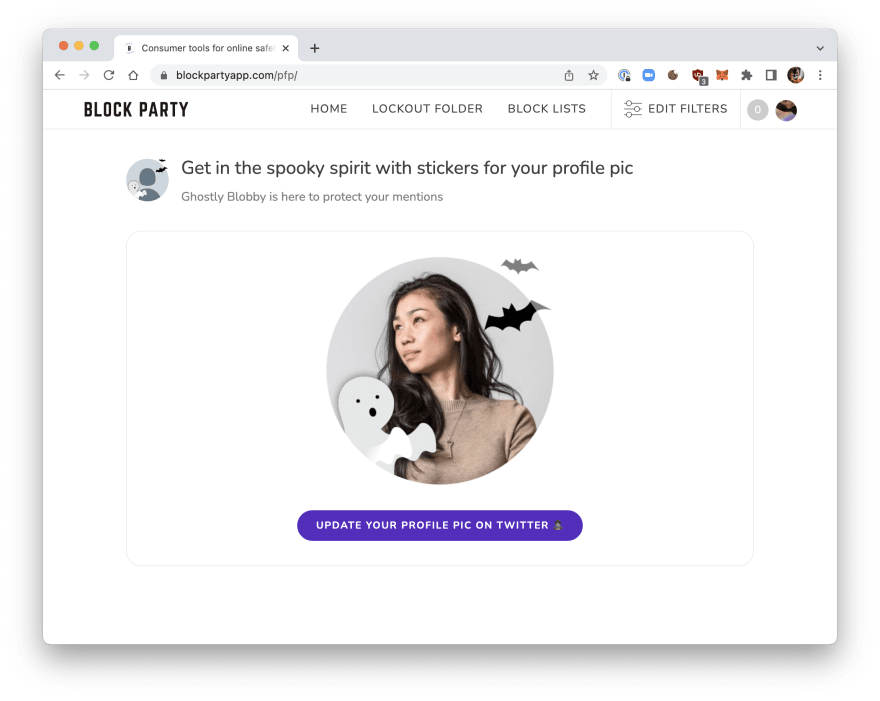
在大多数互联网上,我们的身份被压缩成一个小的个人资料照片和显示名称,这些是微型画布,我们可以在上面表达自己的个性或发表声明。也许参与社会运动,代表组织或品牌;或只是为了宣布我们“开放工作”或感觉到万圣节精神ð»
很好奇如何构建其中一个图像生成器供人们制作个人资料照片?这是Python中的一个简单版本,该版本使用自定义框架和贴纸的部分透明的图像覆盖层。
这取了用户的个人资料照片(来自Twitter),在顶部添加覆盖图像,然后您可以将结果映像作为数据URL获取以在HTML中渲染或将其写入(临时)文件(也可以也可以转回Twitter以更新用户的个人资料照片)。
这篇文章的灵感:我们最近将此功能构建为一个有趣的小项目。感兴趣和我们一起工作吗? We're hiring!
首先,让我们从Twitter获取用户的个人资料照片。我已经手持有关Twitter客户端的作品(对不起),但是您可以使用Tweepy。
from PIL import Image
import requests

PFP_IMAGE_SIZE = (400, 400)  # max/standard size on Twitter

def get_original_pfp_image(twitter_screen_name):
    # TODO(you) Implement this
    client = create_twitter_client_for_app()

    twitter_user_json = client.get_twitter_user_data_by_screen_name(
        twitter_screen_name)
    pfp_url = twitter_user_json.get("profile_image_url_https", "")
    pfp_original_url = pfp_url.replace("_normal", "")

    pfp_image = Image.open(
        requests.get(pfp_original_url, stream=True).raw)

    # We aren't guaranteed that the user's profile image is
    # the right size, which will cause issues when trying to
    # apply the overlay.
    if pfp_image.size != PFP_IMAGE_SIZE:
        pfp_image = pfp_image.resize(
            PFP_IMAGE_SIZE, Image.ANTIALIAS)

    return pfp_image
如果要简化开发和测试,则可以通过本地图像路径进行。
from PIL import Image

PFP_IMAGE_SIZE = (400, 400)

# Note that this has a slightly different function signature
# than the alternative sample code.
def get_original_pfp_image(pfp_image_path):
    pfp_image = Image.open(pfp_image_path)

    if pfp_image.size != PFP_IMAGE_SIZE:
        pfp_image = pfp_image.resize(
            PFP_IMAGE_SIZE, Image.ANTIALIAS)

    return pfp_image
接下来,让我们加载覆盖图像,用原始配置文件照片复合,然后创建新的覆盖图像。
此处的覆盖图应为具有透明度的400x400 PNG。
import PIL
from PIL import Image

def get_overlay_image(overlay_image_path):
    overlay_image = Image.open(overlay_image_path)
    return overlay_image

def generate_overlaid_image(twitter_screen_name):
    pfp_image = get_original_pfp_image(twitter_screen_name)
    if not pfp_image:
        return None

    # We need RGBA mode for transparency in the image
    pfp_image_rgba = pfp_image.convert(mode="RGBA")

    # TODO(you) Replace with your overlay image path
    overlay_image = get_overlay_image("overlay.png")
    overlaid_pfp_image = PIL.Image.alpha_composite(
        pfp_image_rgba, overlay_image)
    return overlaid_pfp_image
现在让我们将图像作为数据URL,以便我们可以在html中渲染!
import base64
from io import BytesIO

DATA_IMAGE_PREFIX = "data:image/png;base64,"

def generate_overlaid_pfp_image_data_url(twitter_screen_name):
    overlaid_pfp_image = generate_overlaid_pfp_image(
        twitter_screen_name)
    if not overlaid_pfp_image:
        return None

    image_io = BytesIO()
    overlaid_pfp_image.save(image_io, "png", quality=95)
    data_url = DATA_IMAGE_PREFIX + base64.b64encode(
        image_io.getvalue()).decode("ascii")
    return data_url
在Jinja中预览 - 例如,Twitter使用的所有不同尺寸 - 我们只使用此映像数据URL作为img元素的src。
{% for dims in [(24, 24), (48, 48), (73, 73), (400, 400)] %}
    <img src="{{ image_data_url }}"
         width="{{ dims[0] }}"
         height="{{ dims[1] }}" />
{% endfor %}
最后,如果您想在Twitter上设置用户的配置文件照片,则可以创建一个临时文件并通过API发送。
import base64
from io import BytesIO

DATA_IMAGE_PREFIX = "data:image/png;base64,"

def update_user_twitter_pfp(twitter_user_id, image_data_url):
    image_data = image_data_url[len(DATA_IMAGE_PREFIX):]

    buffer = BytesIO(base64.b64decode(image_data))
    image_tempfile = tempfile.NamedTemporaryFile(suffix=".png")

    try:
        image_tempfile.write(buffer.read())
        image_tempfile.flush()

        # This client is created with the user's OAuth
        # credentials (vs. app credentials) so we can
        # set their profile photo.
        client = create_twitter_client_for_user(
            twitter_user_id)
        client.update_twitter_user_profile_image(
            image_tempfile.name)
    finally:
        buffer.close()
        image_tempfile.close()
这是外观!

